
Data Sync Quick Start
Get started with Data Sync quickly using our comprehensive guide. Learn to set up, configure, and optimize your data synchronization environment for seamless data integration.
Tacnode’s Data Sync service provides efficient data synchronization capabilities, enabling easy and rapid data import/export to and from the platform. This quick start guide demonstrates how to create a synchronization job using MySQL as an example.
Feature Highlights
- Flexible Scope: Synchronize single tables, multiple tables, entire databases, or complete instances
- Data Transformation: Perform field filtering, field mapping, and type conversion
- Shard Consolidation: Merge sub-databases and sub-tables into designated logical tables
- Schema Evolution: Automatically handle DDL changes, including new tables and fields
Quick Start Example: MySQL to Tacnode
This example demonstrates synchronizing data from MySQL to Tacnode.
Step 1: Network Connectivity
Most cloud RDS services require IP whitelisting for external access. Add the following public IP addresses to your RDS whitelist according to your cloud provider’s configuration method:
| Cloud Provider | Region | Public IP |
|---|---|---|
| AWS | Oregon (aws-oregon) | 54.188.106.226 |
Step 2: Create Data Import Job
- Navigate to Data Sync → Data Import in the left sidebar
- Click the Data Import Job button in the upper right corner
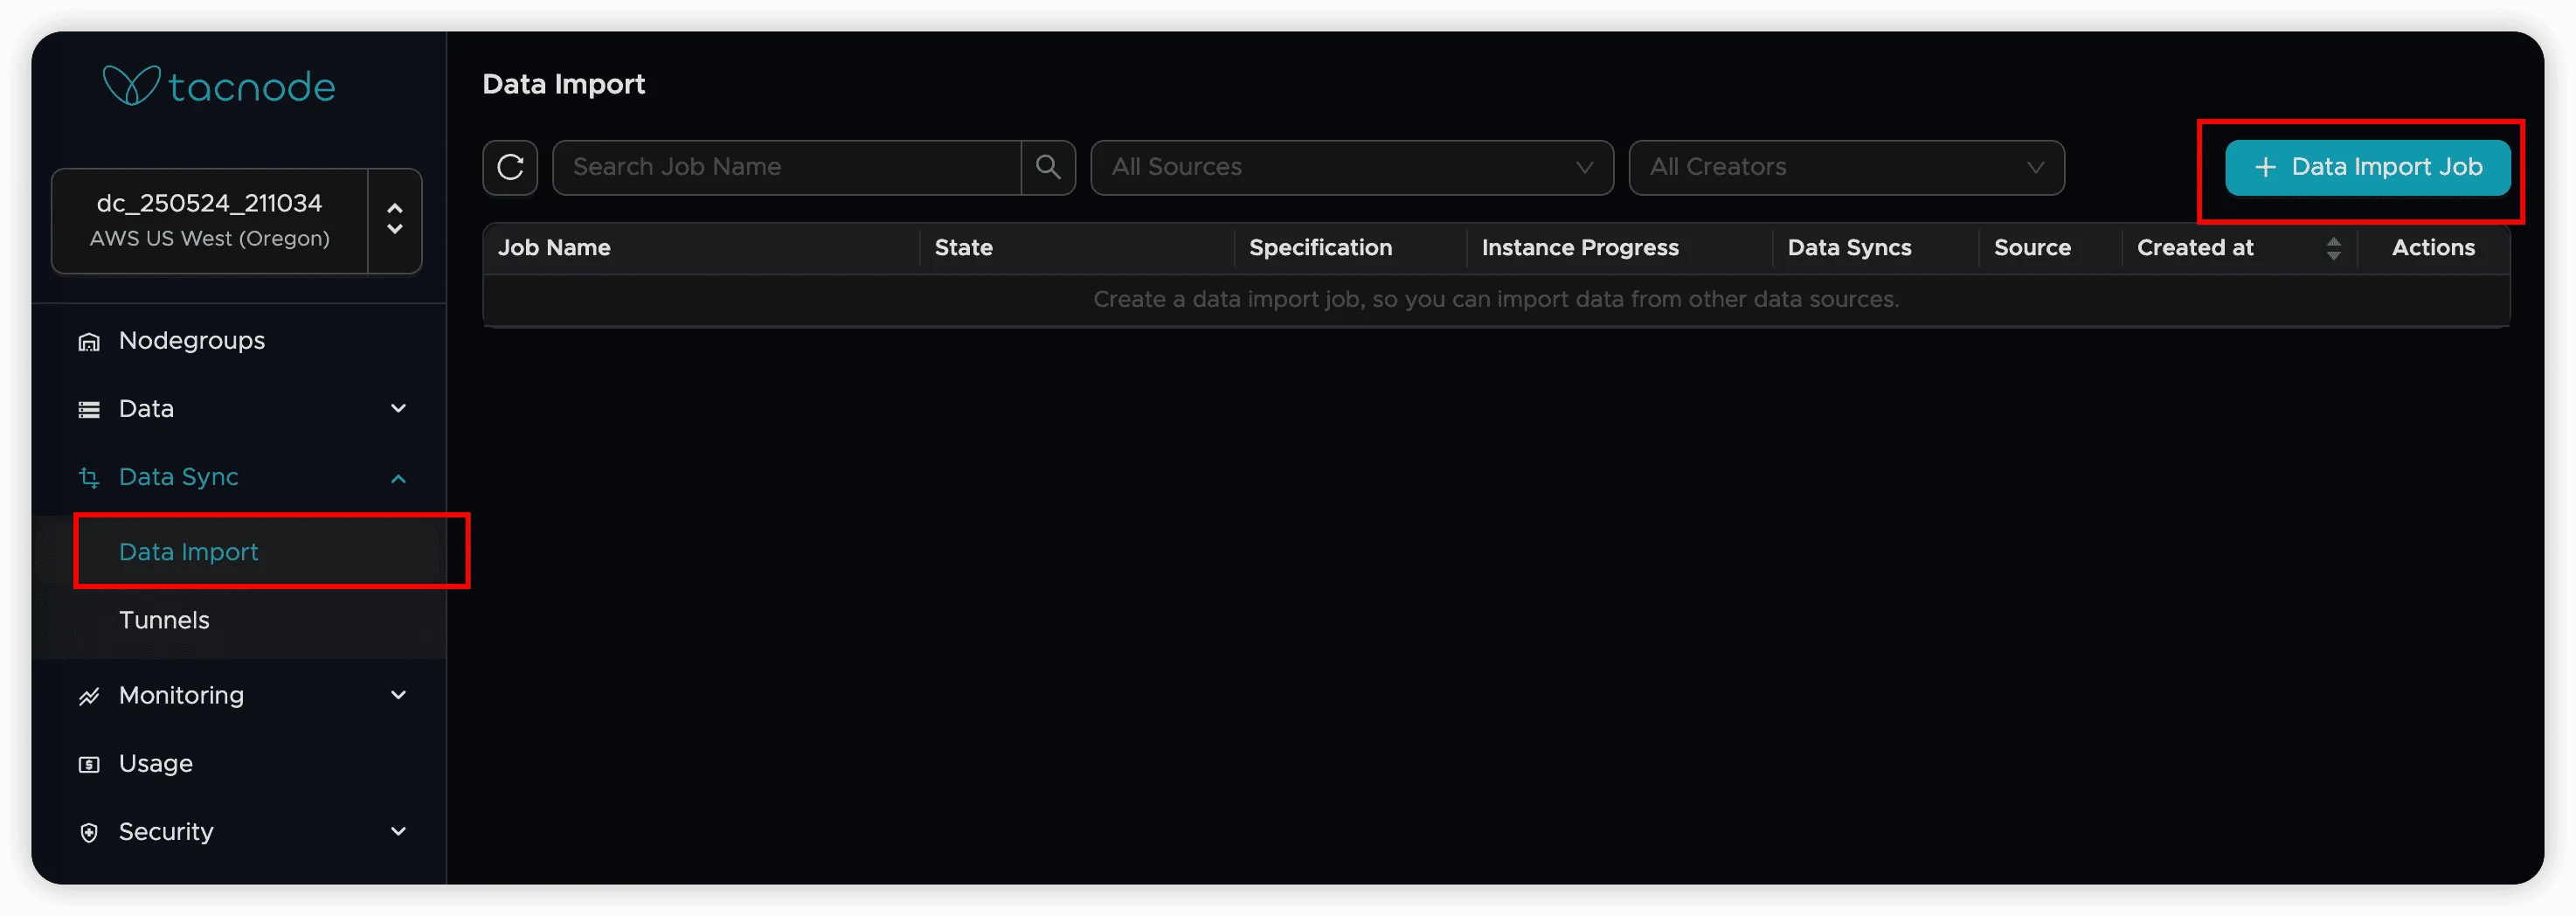
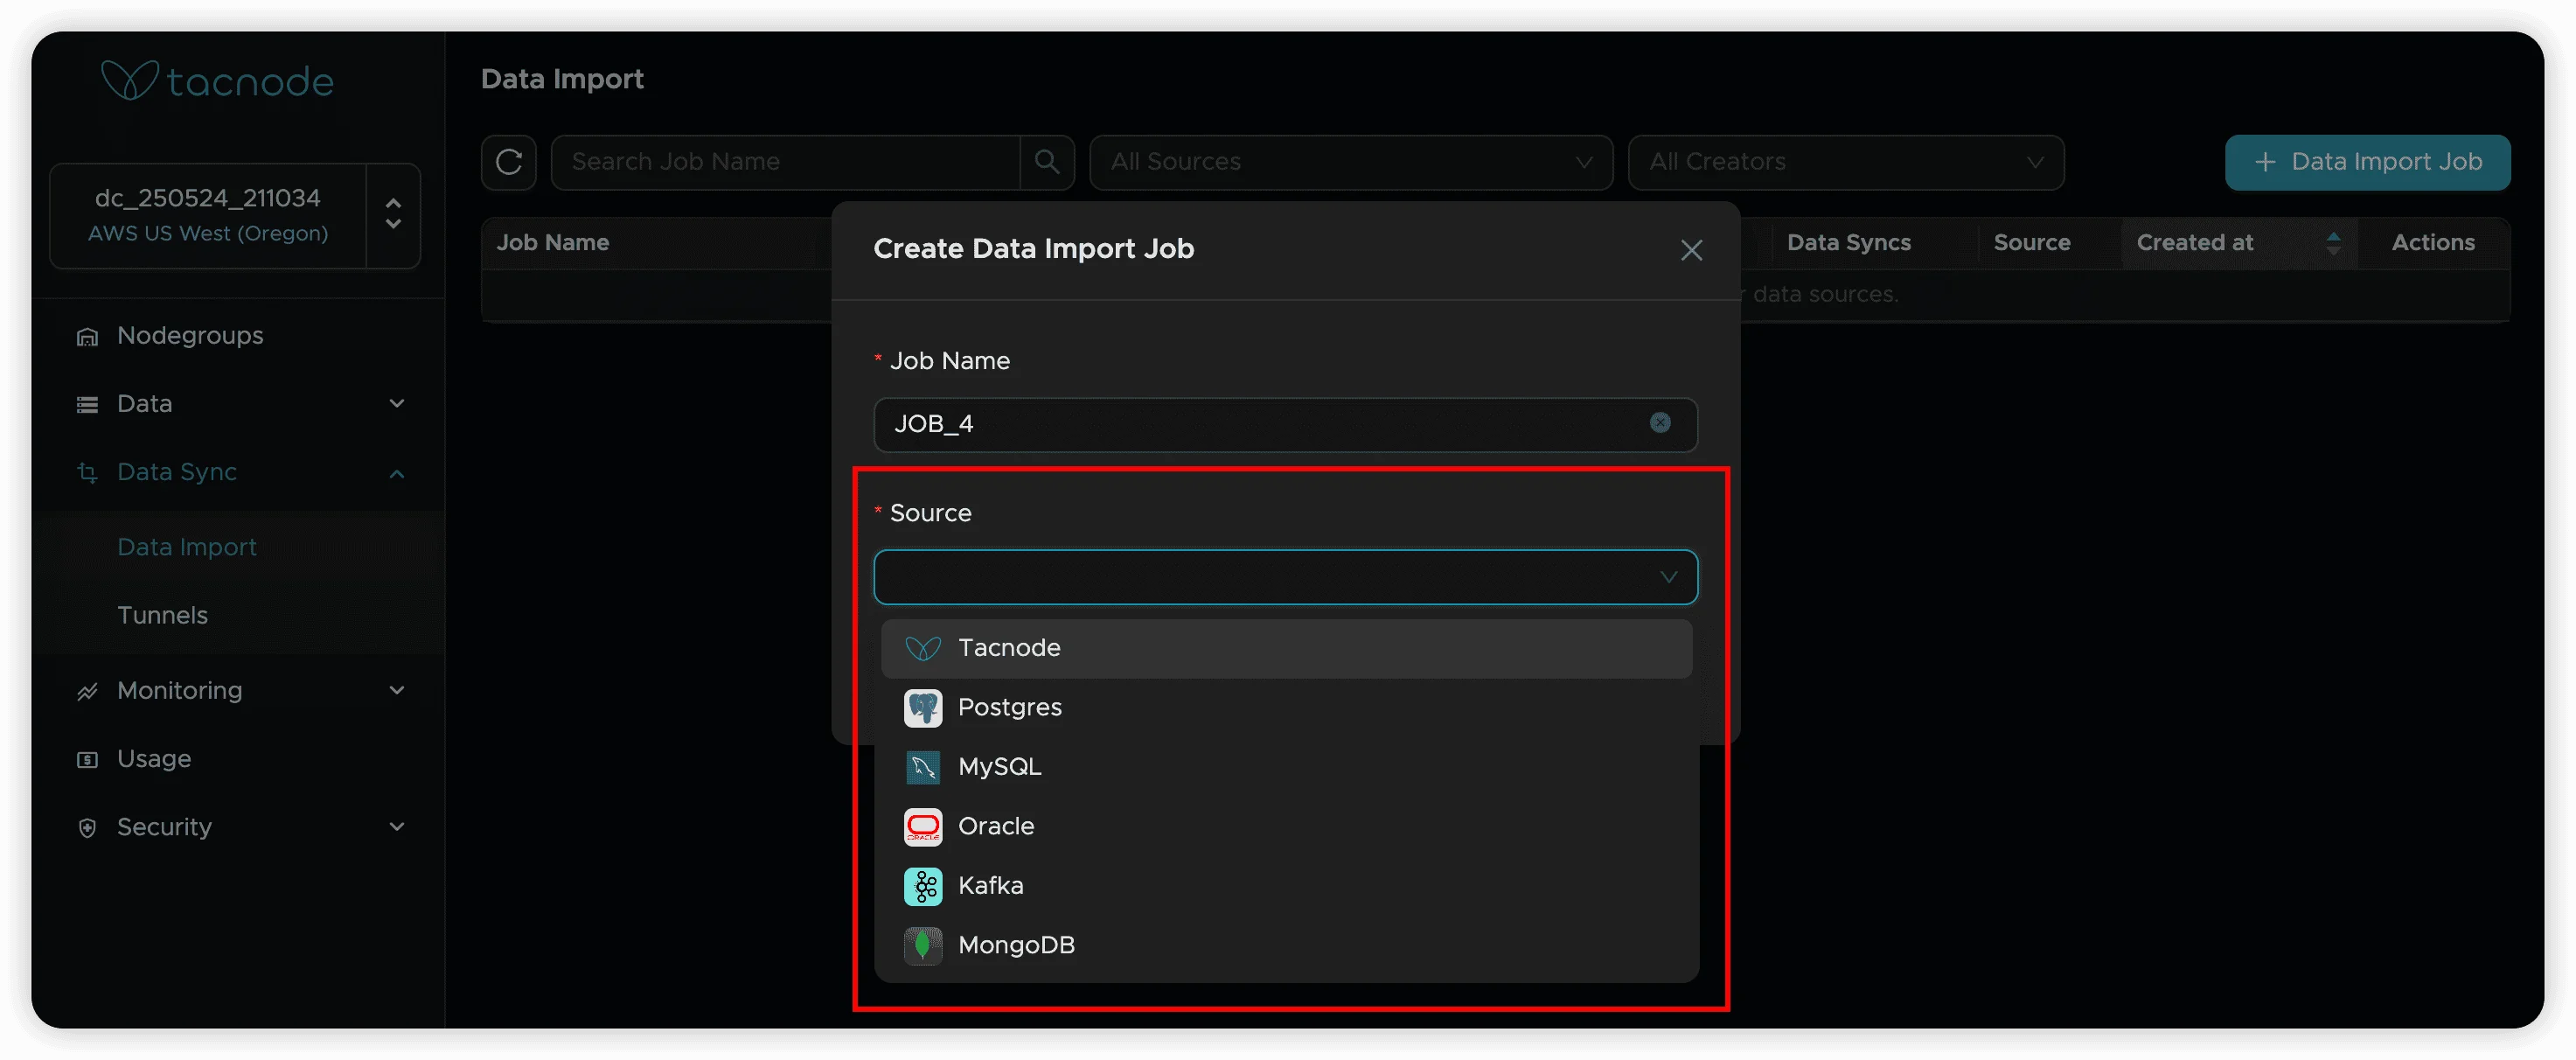
- In the dialog box, enter a descriptive job name and select MySQL as the data source type
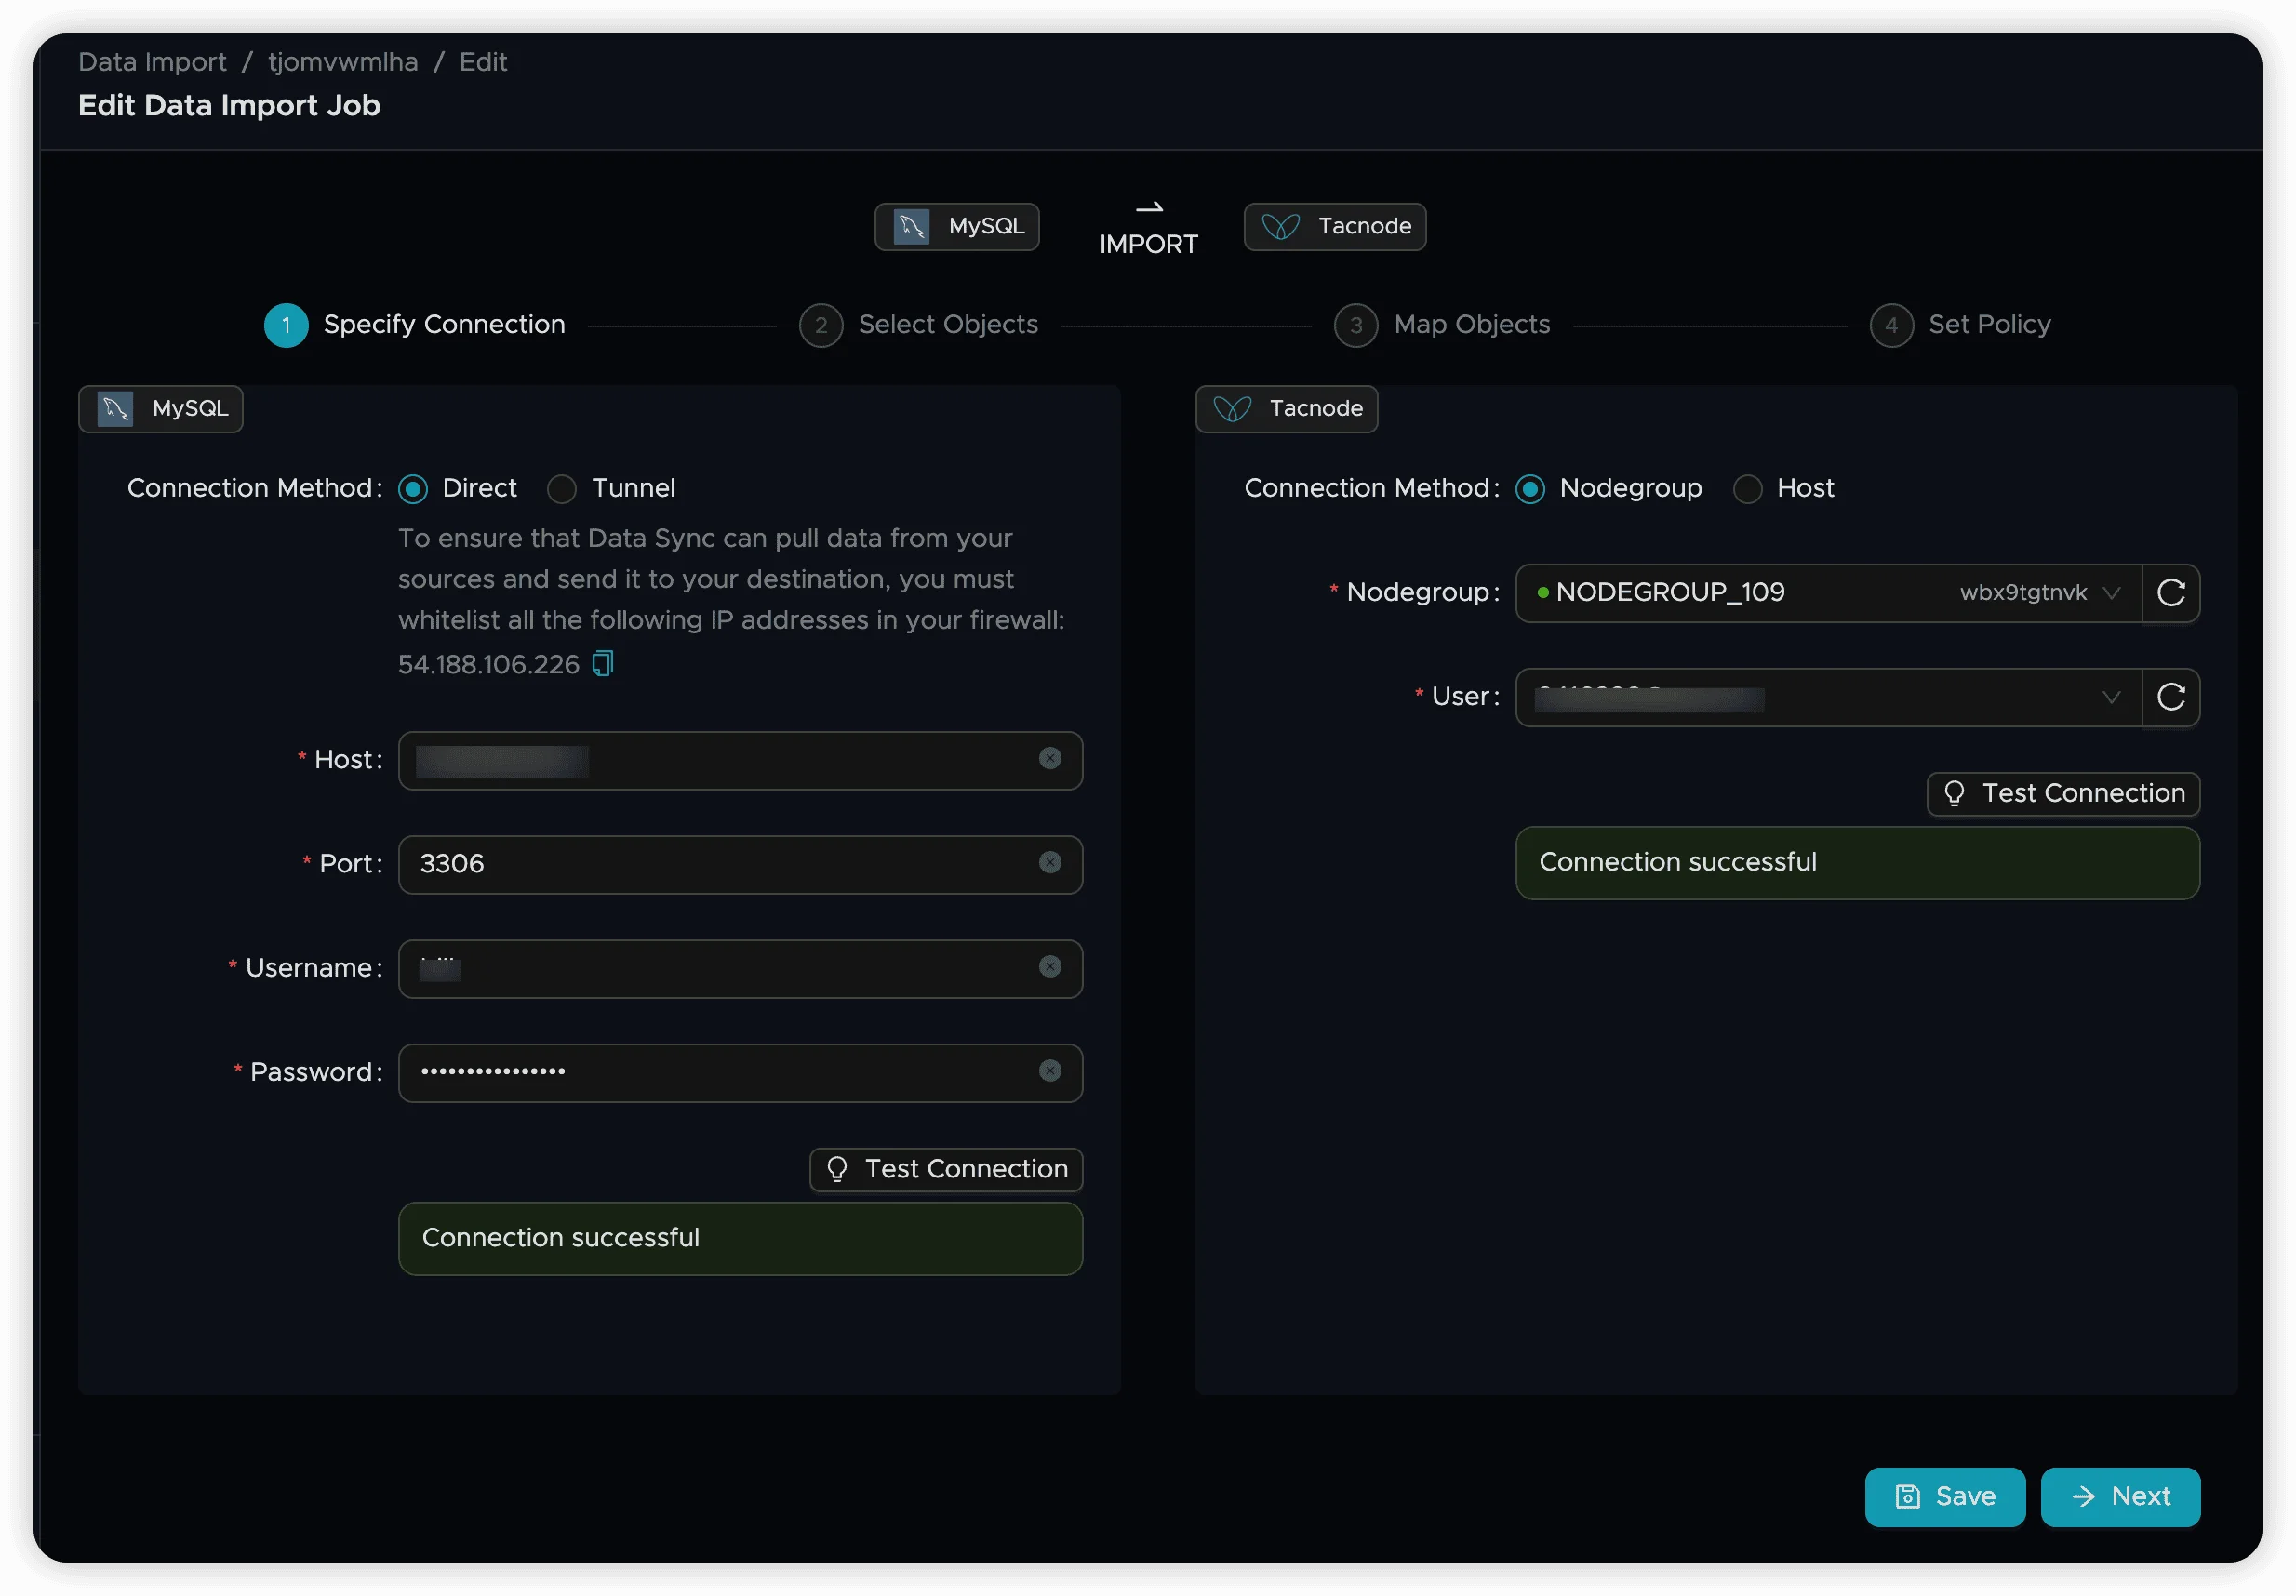
Step 3: Configure Network Connection
- Source Configuration: Enter your MySQL connection details on the left panel and click Test Connection to verify connectivity
- Target Configuration: Select your target Nodegroup on the right panel and click Test Connection to verify connectivity
Both connections should display “Connection Successful” when properly configured.
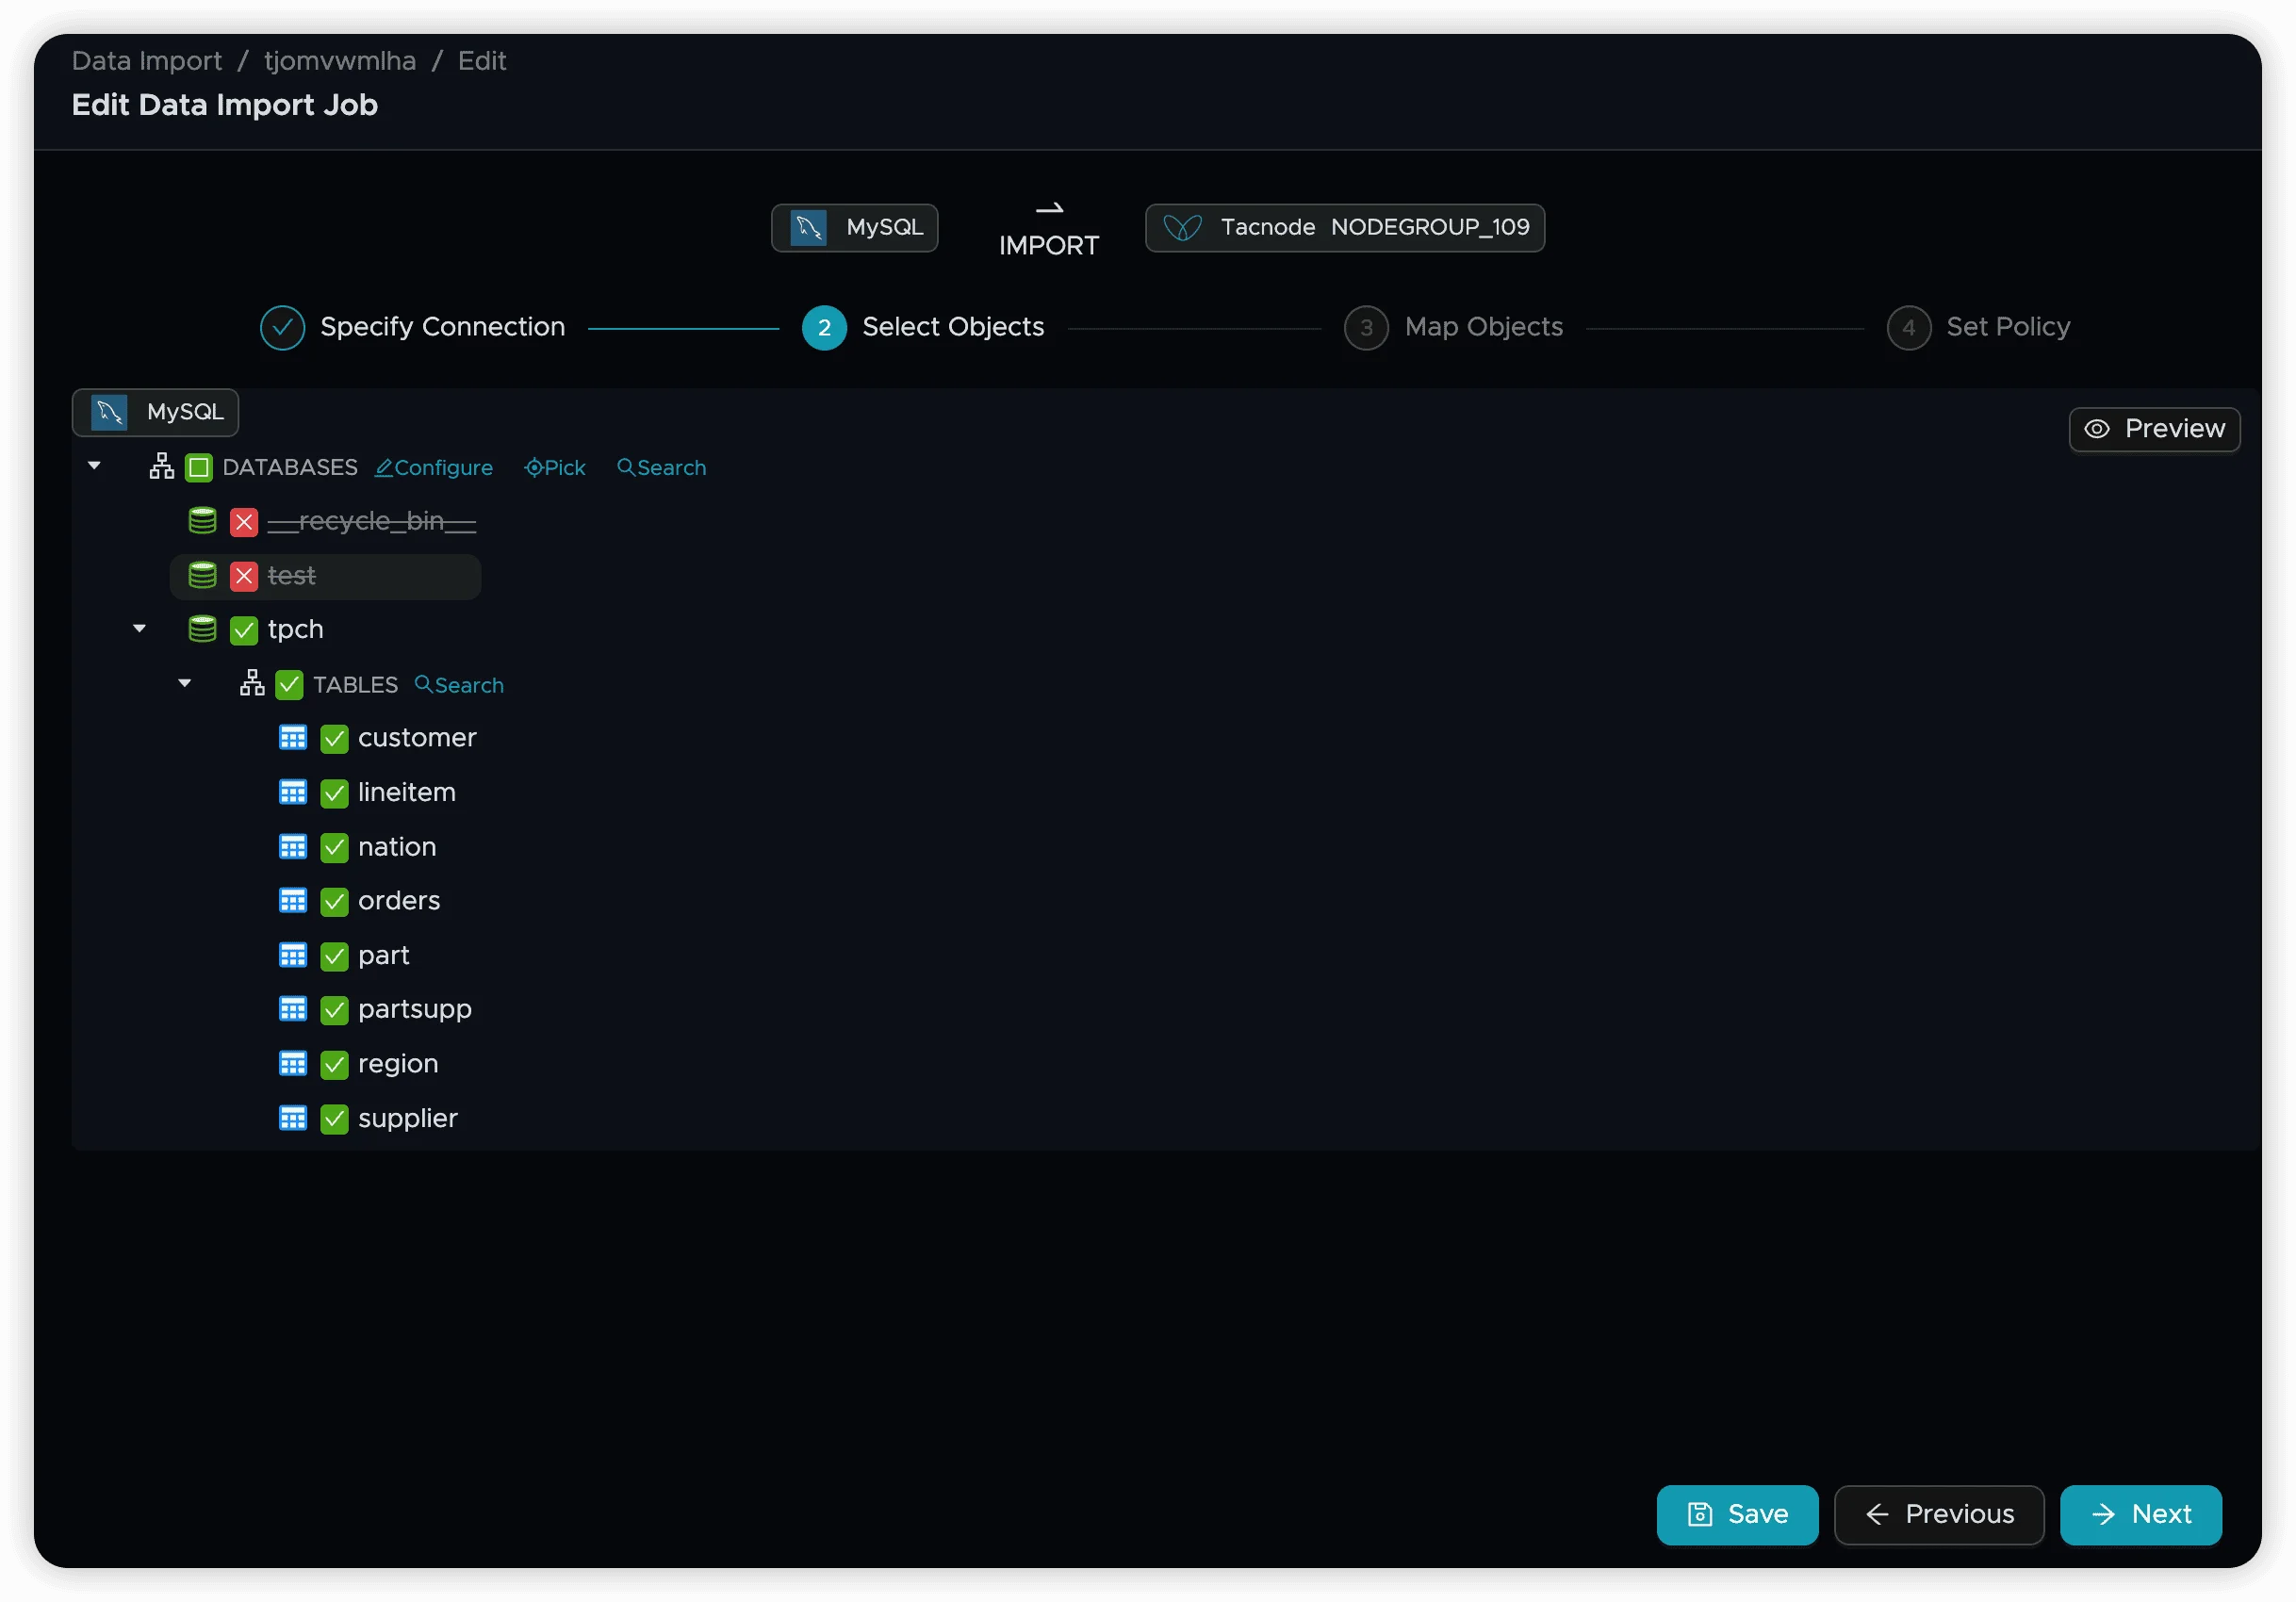
Step 4: Select Objects
Choose which databases, schemas, and tables to synchronize. For detailed selection options and filtering capabilities, see Data Sync Select Objects.
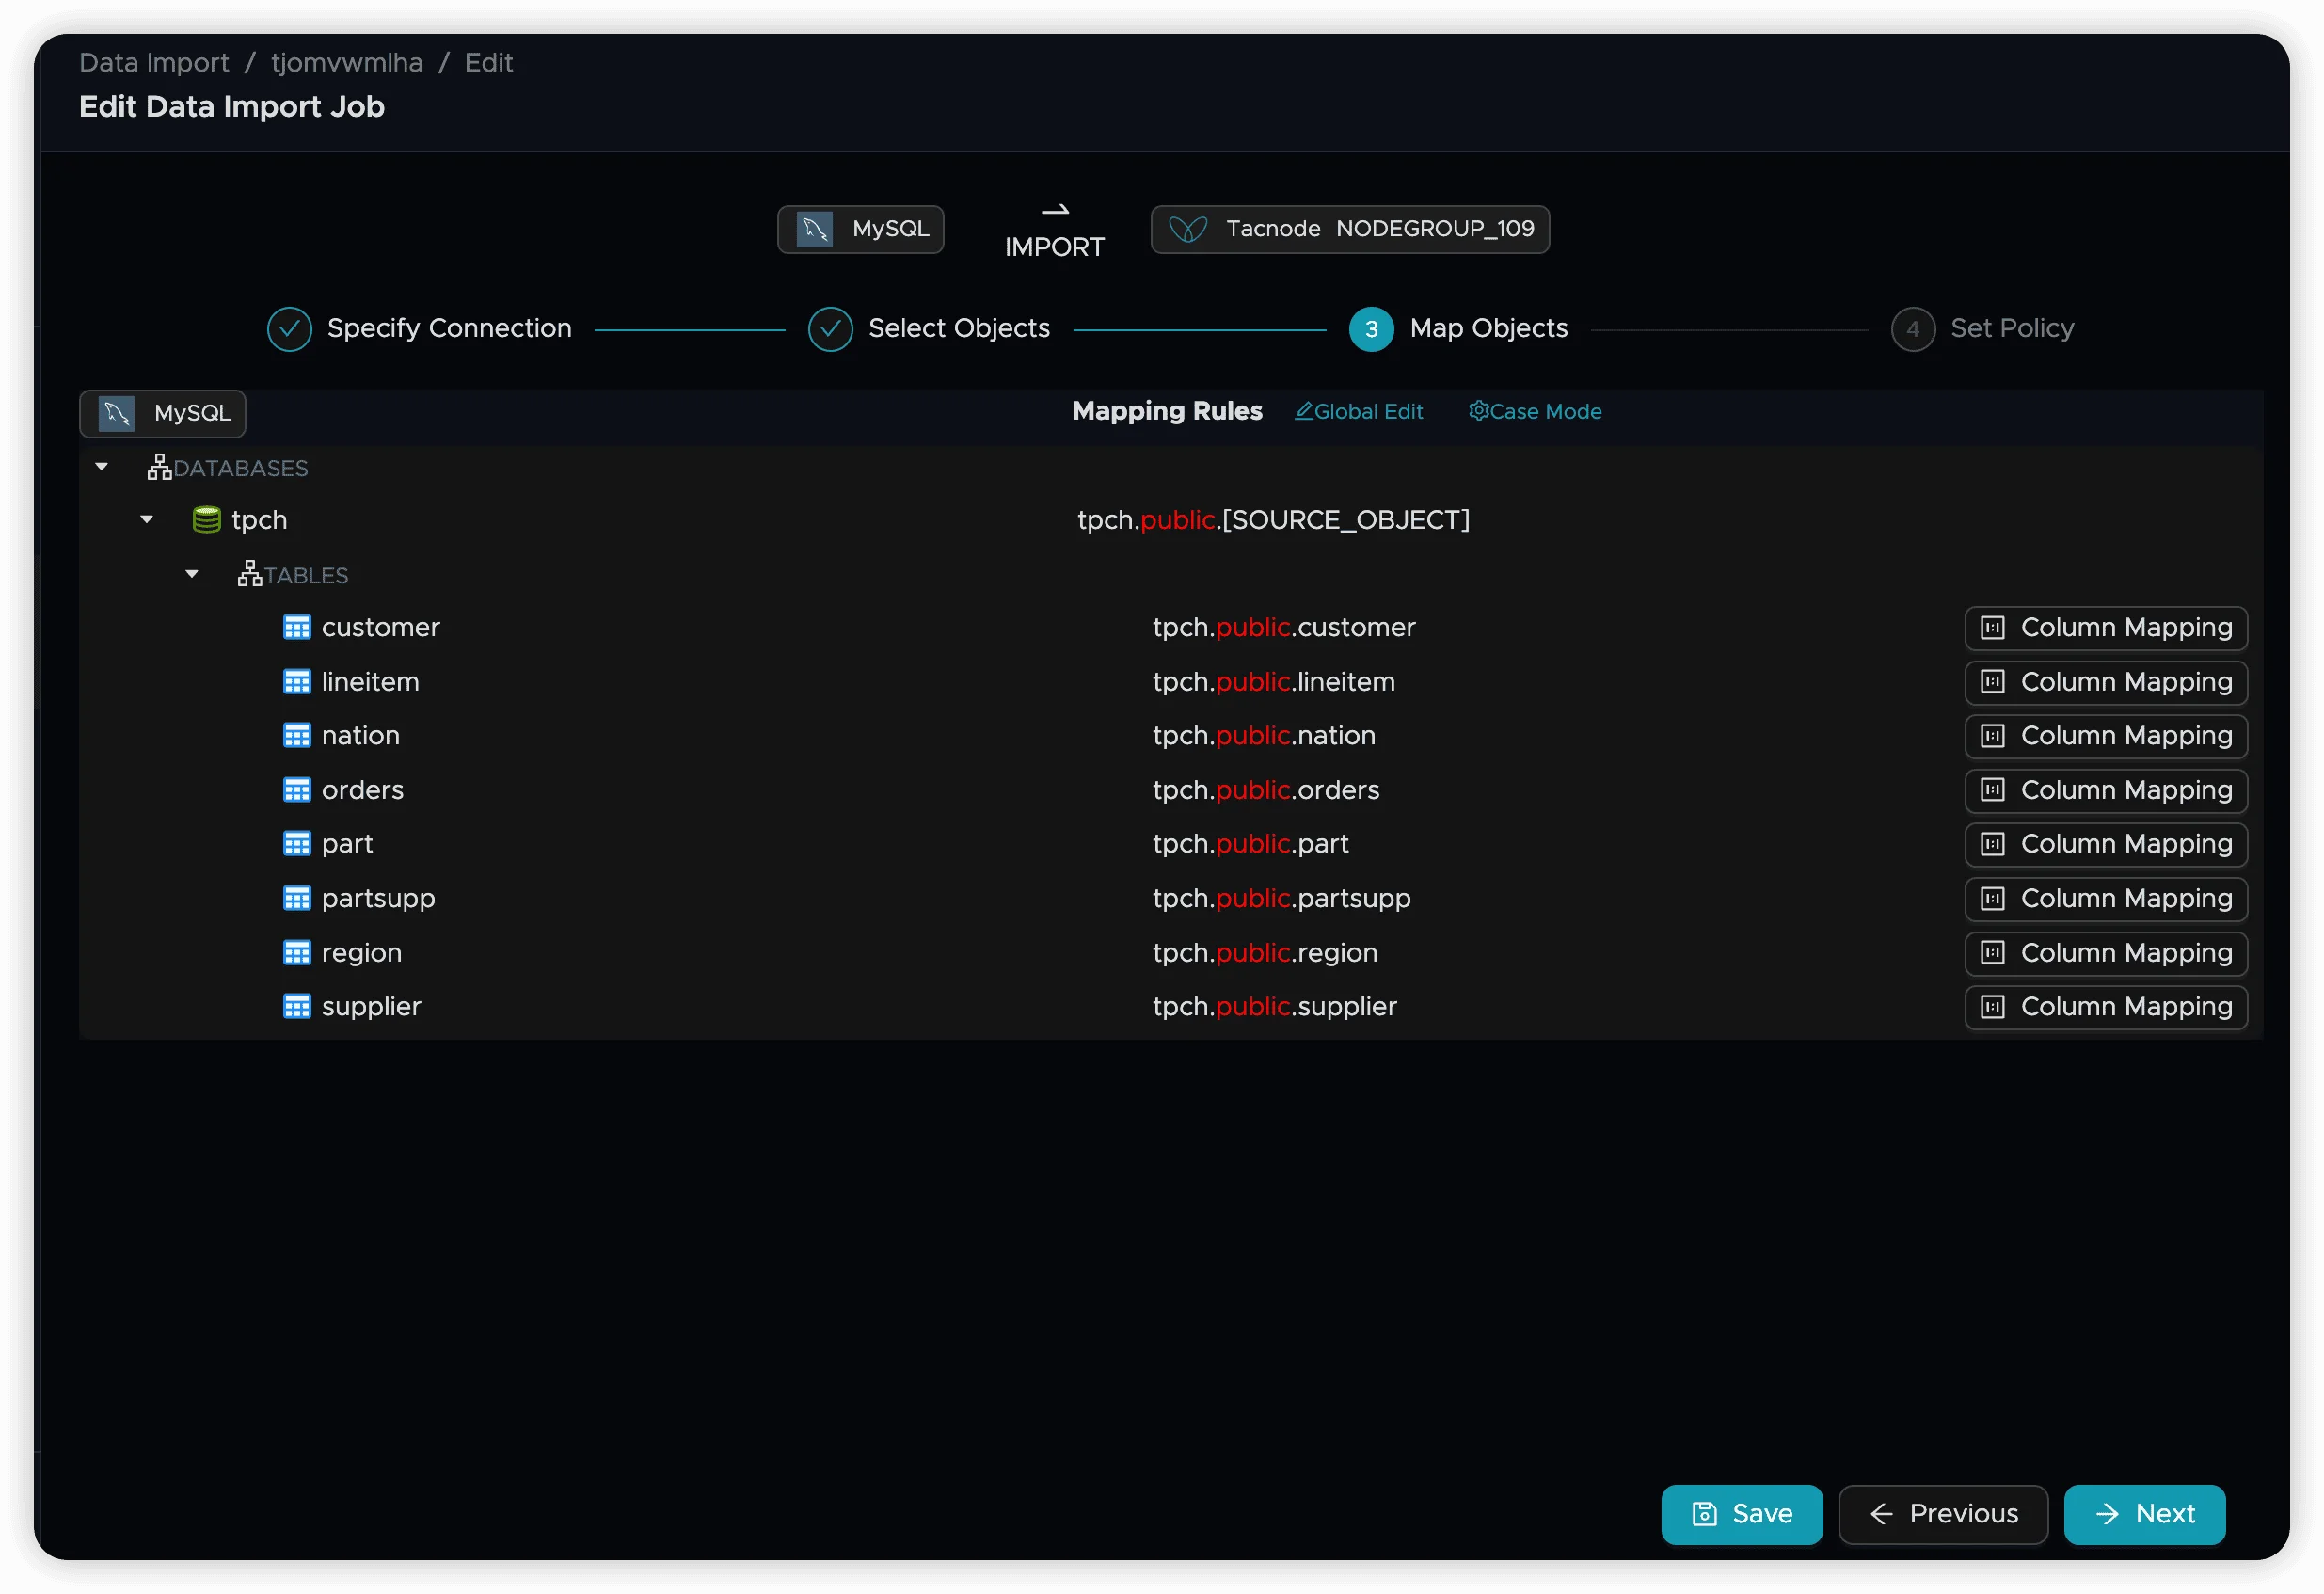
Step 5: Map Objects
Configure how source objects map to destination objects. The default mapping places MySQL database tables into the public schema of your target Nodegroup. For advanced mapping options, see Data Sync Map Objects.
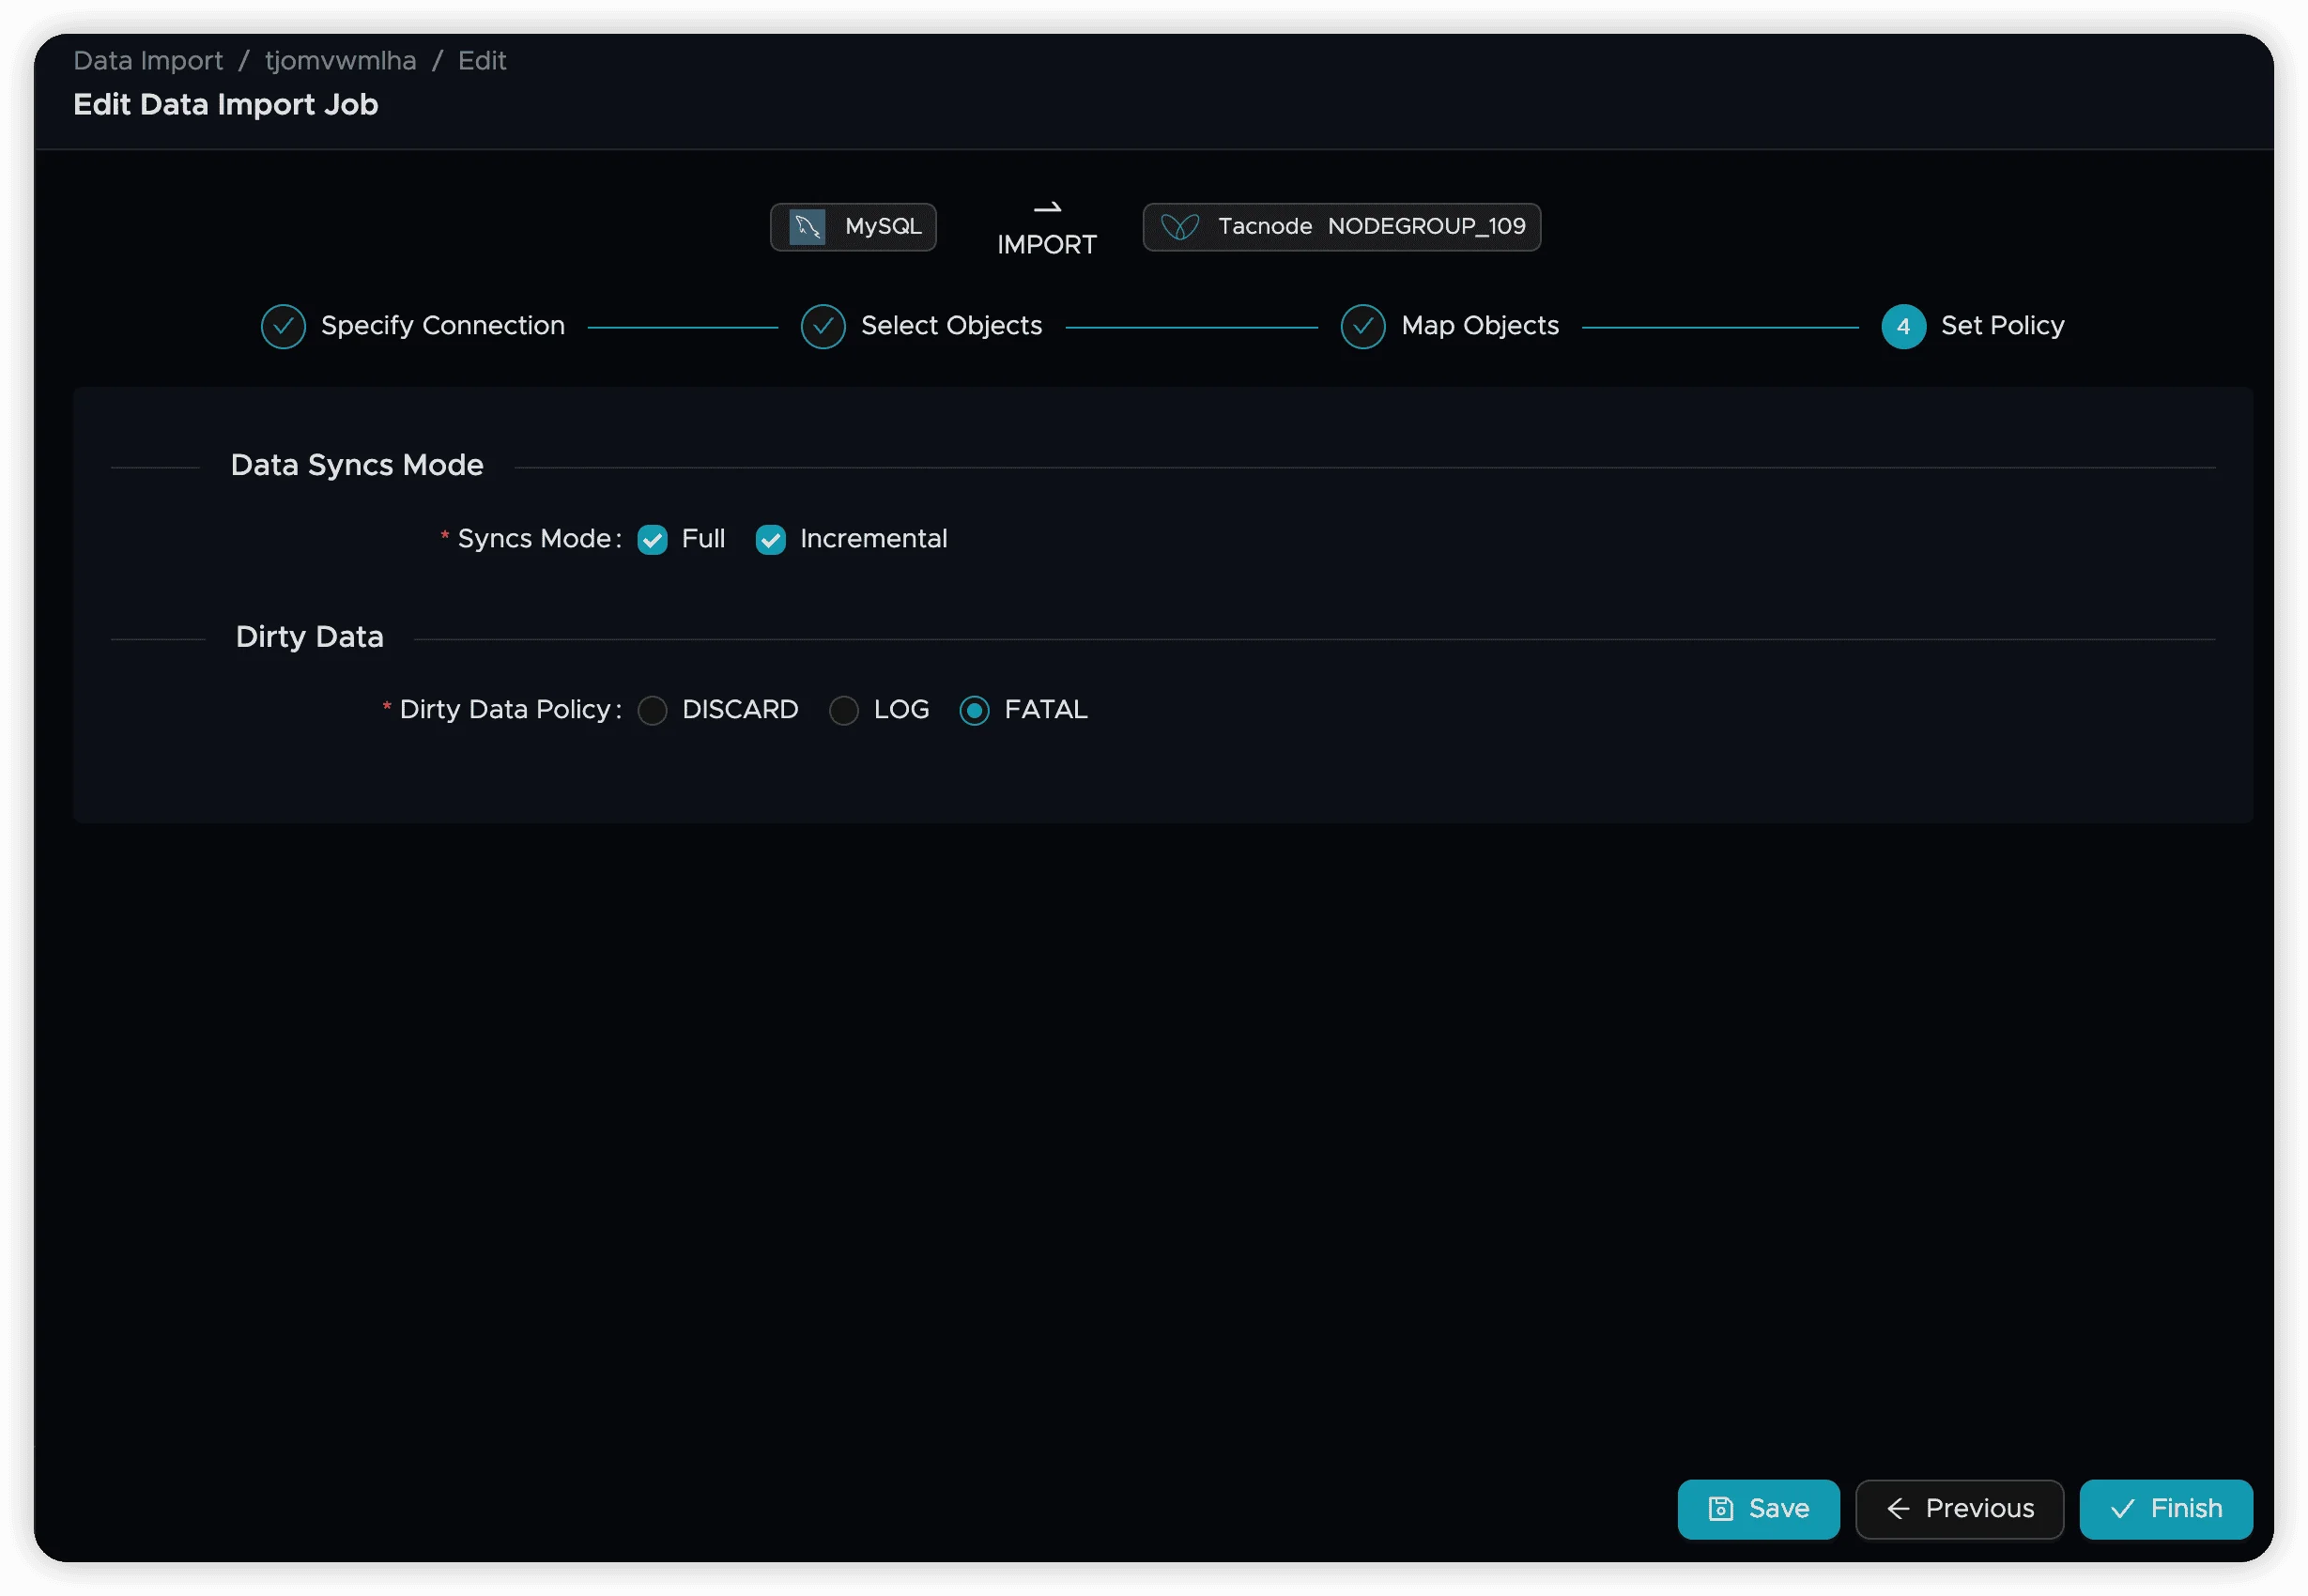
Step 6: Set Synchronization Policy
Configure synchronization behavior, including how to handle data conflicts and DDL changes.
Step 7: Launch the Job
- Review your configuration and click Finish to create the job
- Select appropriate resource allocation for your synchronization needs

- Monitor job status on the overview page
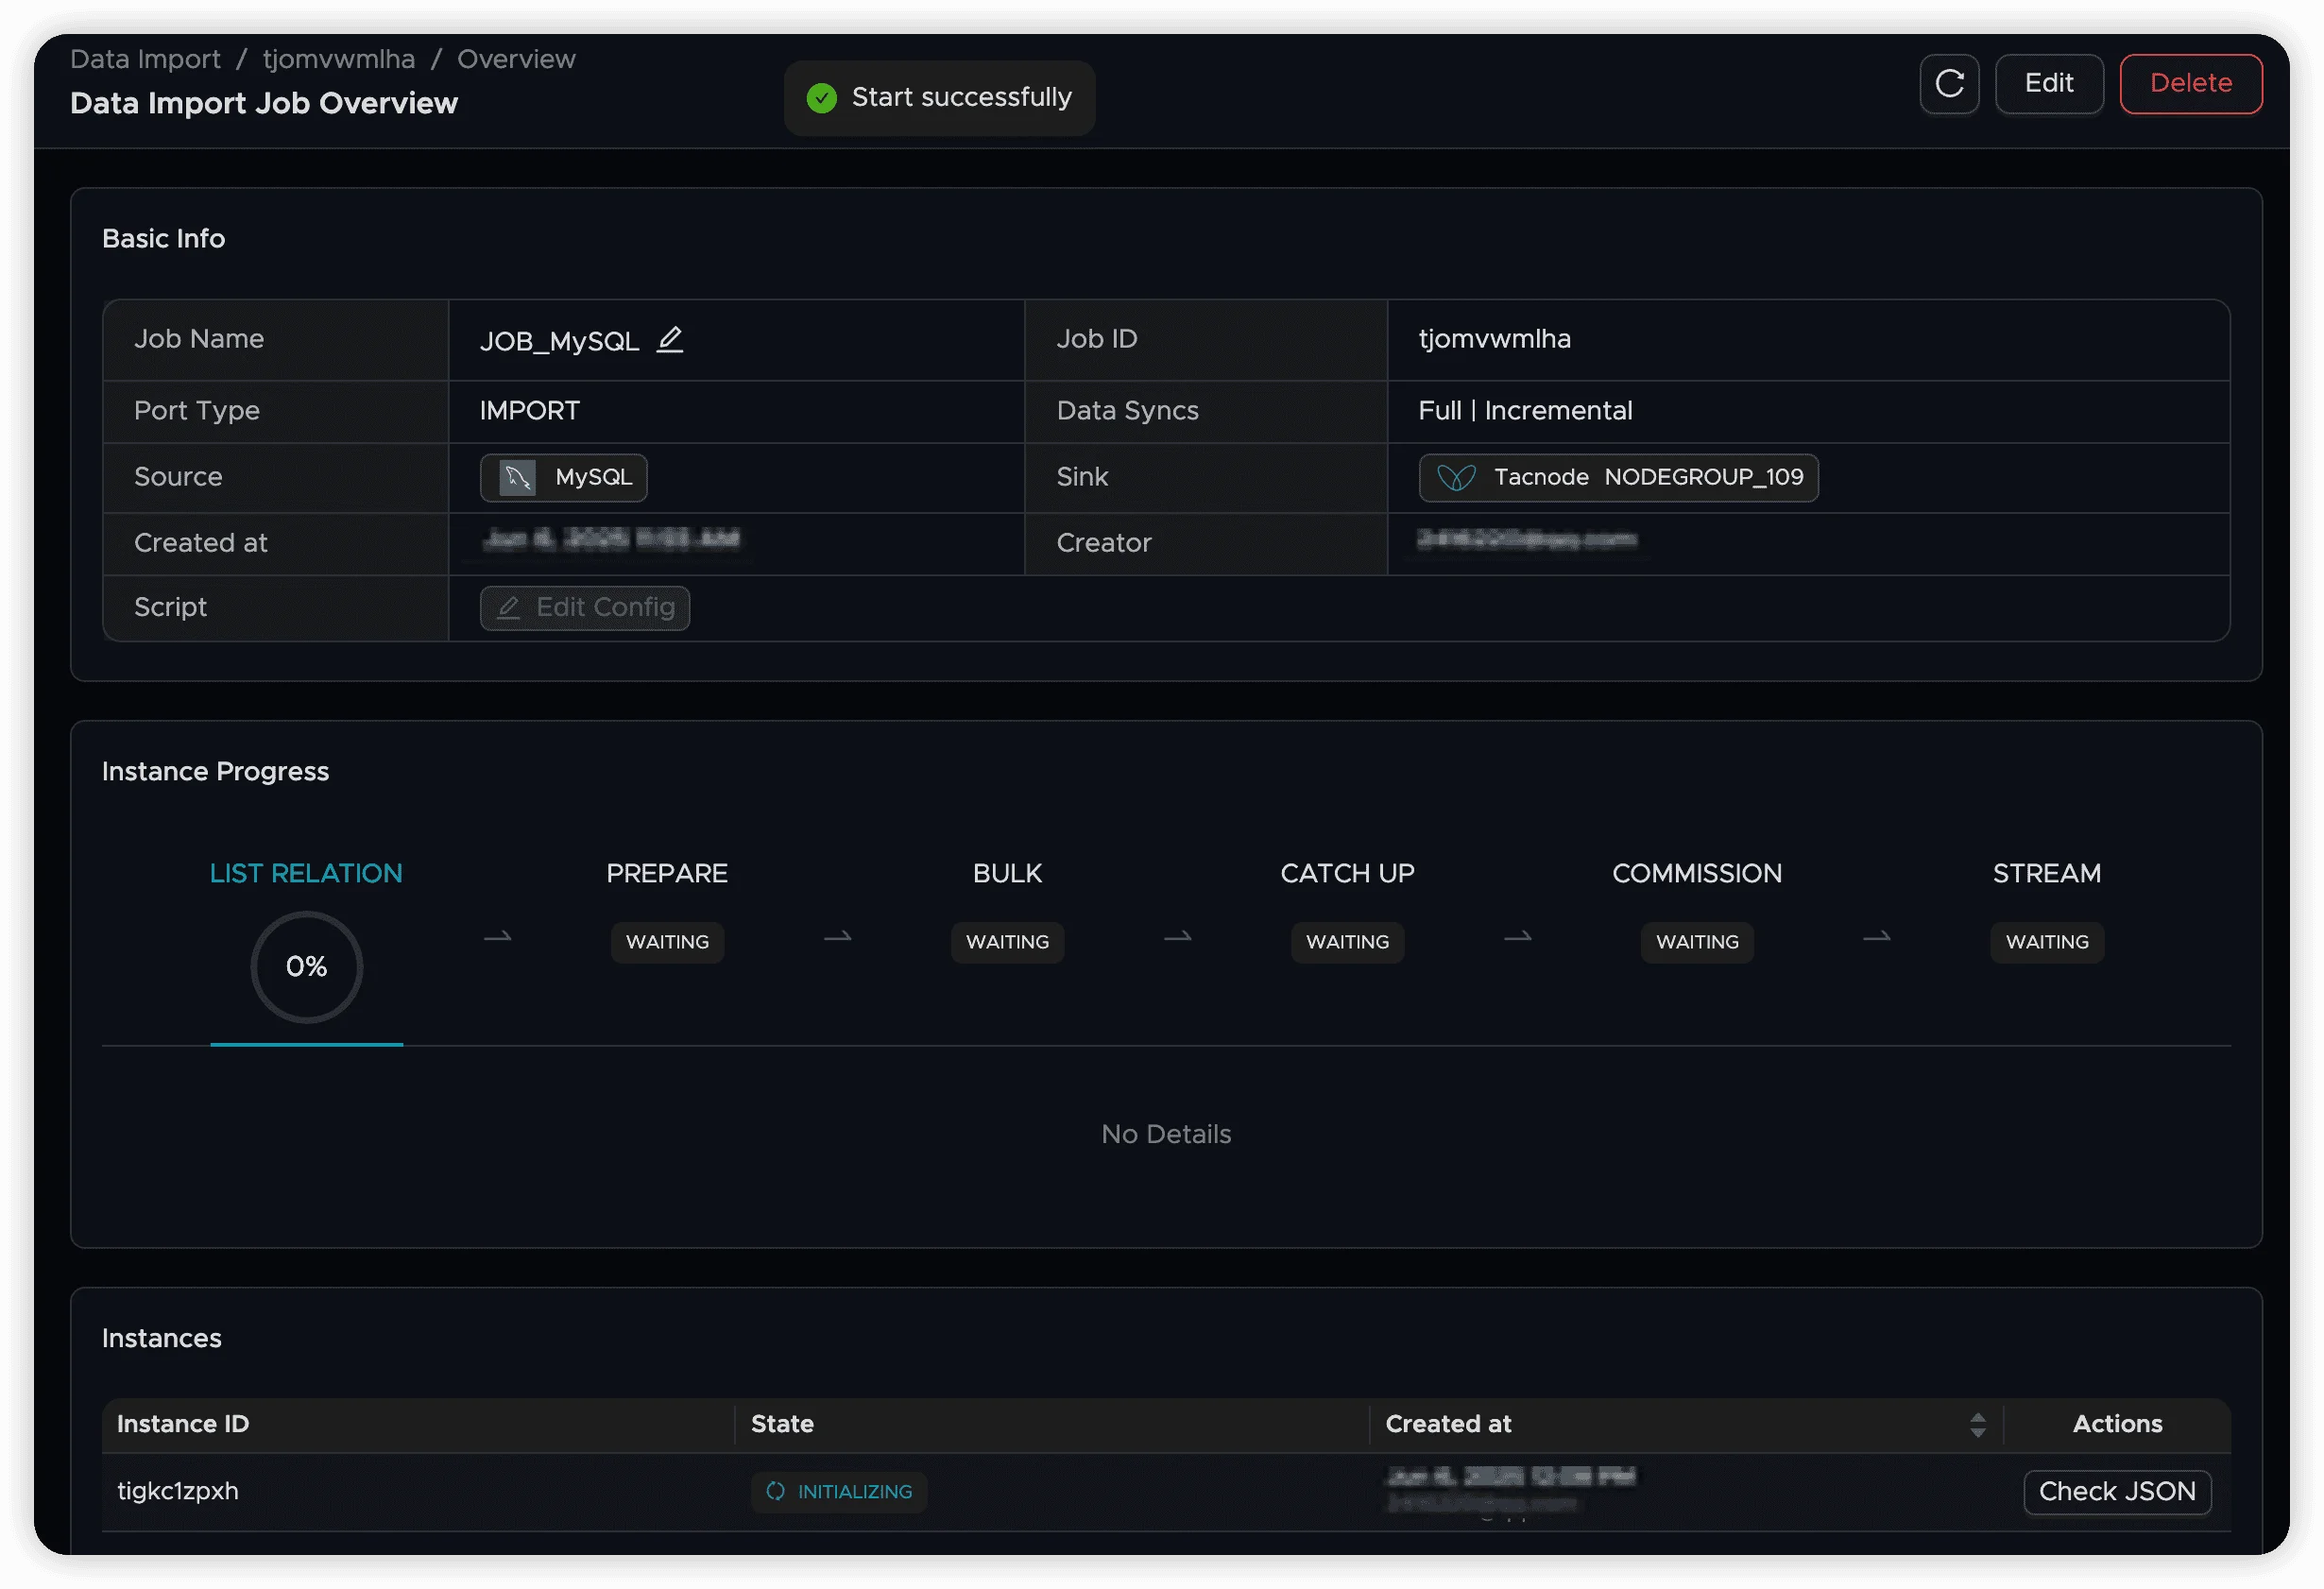
After the job starts successfully, you can monitor its progress and status. For detailed job management information, see Data Sync Job Operations.