
Point-in-Time Recovery(PITR)
Learn how to implement Point-in-Time Recovery (PITR) with Tacnode to restore databases to any specific moment with millisecond precision.
Point-in-Time Recovery (PITR) enables you to restore a database to any specific moment within a recent timeframe, with millisecond precision. This feature is essential for recovering from accidental data changes, corruption, or unwanted transactions.
Understanding PITR
How PITR Works
- Continuous Protection: Automatically captures all database changes
- Precise Recovery: Restore to any moment, down to the millisecond
- Database Level: Operates on individual databases, not entire instances
- Default Enabled: Activated automatically for all databases
Recovery Window
- Standard Retention: 7 days of recovery history
- Customizable Period: Retention can be extended based on requirements
- Rolling Window: Older recovery points are automatically pruned
When to Use PITR
Common Scenarios
- Accidental Data Deletion: Recover specific rows or tables
- Faulty Updates: Revert problematic batch operations
- Schema Changes: Undo unwanted structural modifications
- Application Errors: Restore before bug-induced data corruption
- Compliance Requirements: Meet regulatory recovery standards
Advantages Over Full Backups
- Granular Recovery: Target exact moments instead of scheduled backup times
- Faster RTO: Quicker recovery for recent incidents
- Minimal Data Loss: Reduce RPO to near-zero for recent changes
- Operational Flexibility: No need to schedule special backups for changes
Performing Point-in-Time Recovery
Prerequisites
- Source database must be accessible
- Sufficient privileges for restore operations
- Target nodegroup must have adequate resources
- Clear understanding of the desired recovery point
Recovery Process
-
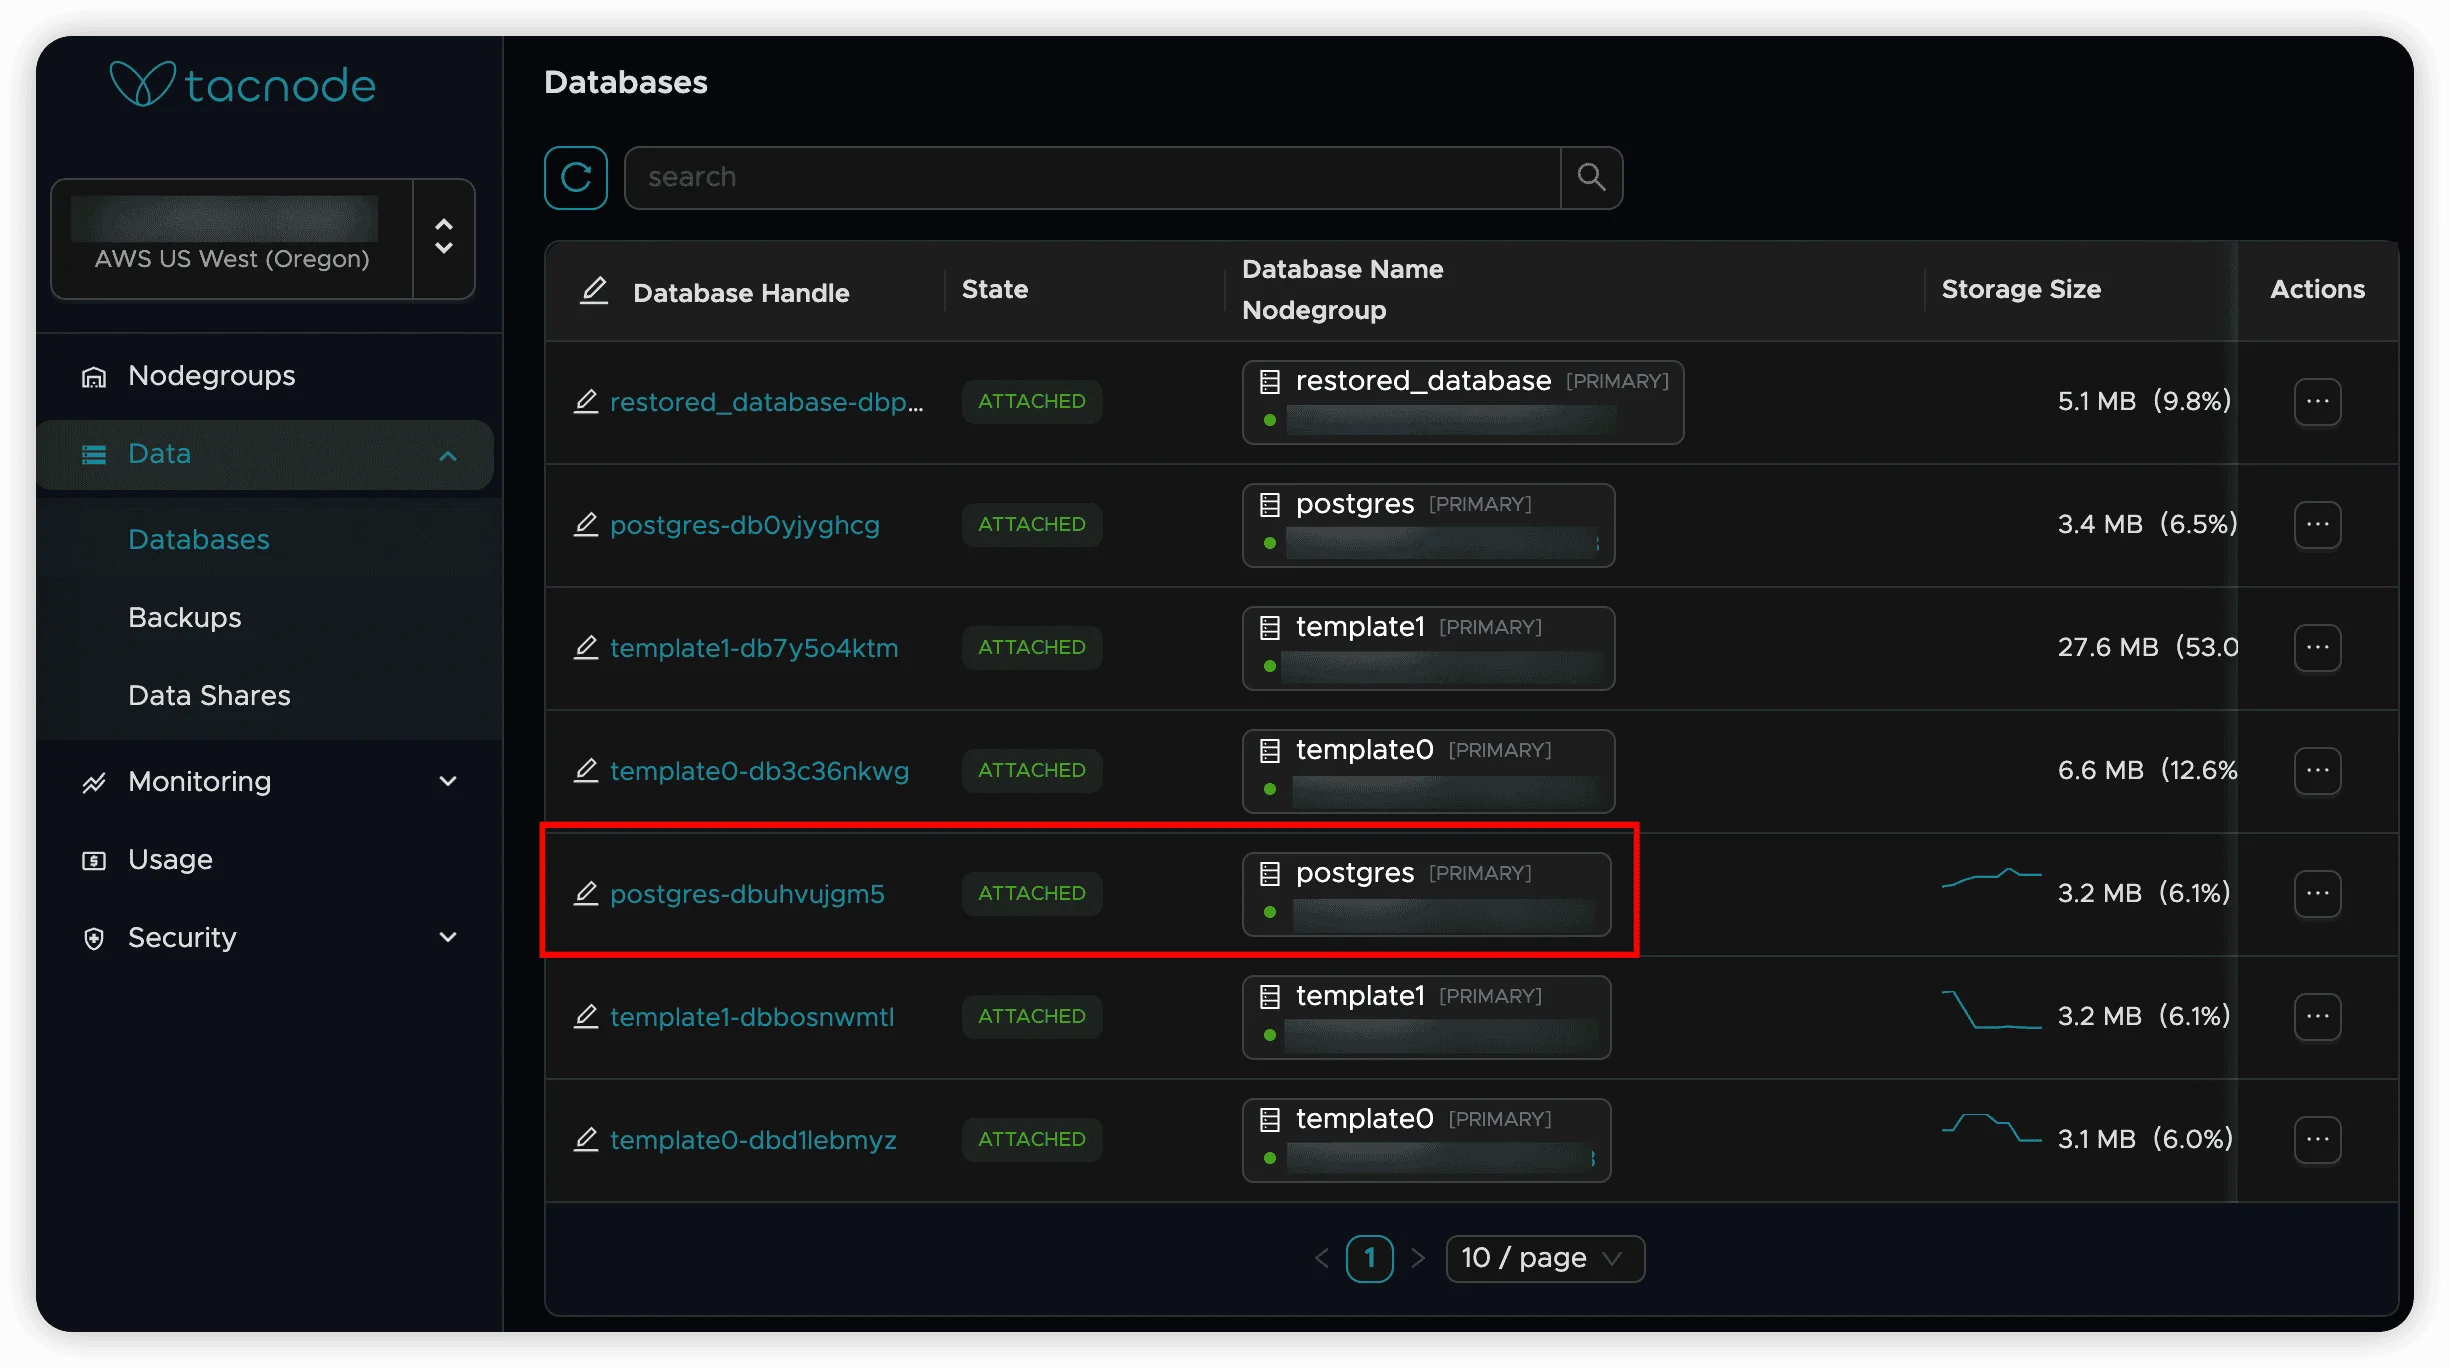
Identify the Target Database
- Navigate to the “Database” tab in your Context Lake
- Locate the database you need to restore
- Note the database status and current state
-
Initiate PITR Operation
- Click the “Restore” button for the target database
- Select “Point-in-Time Recovery” option
-
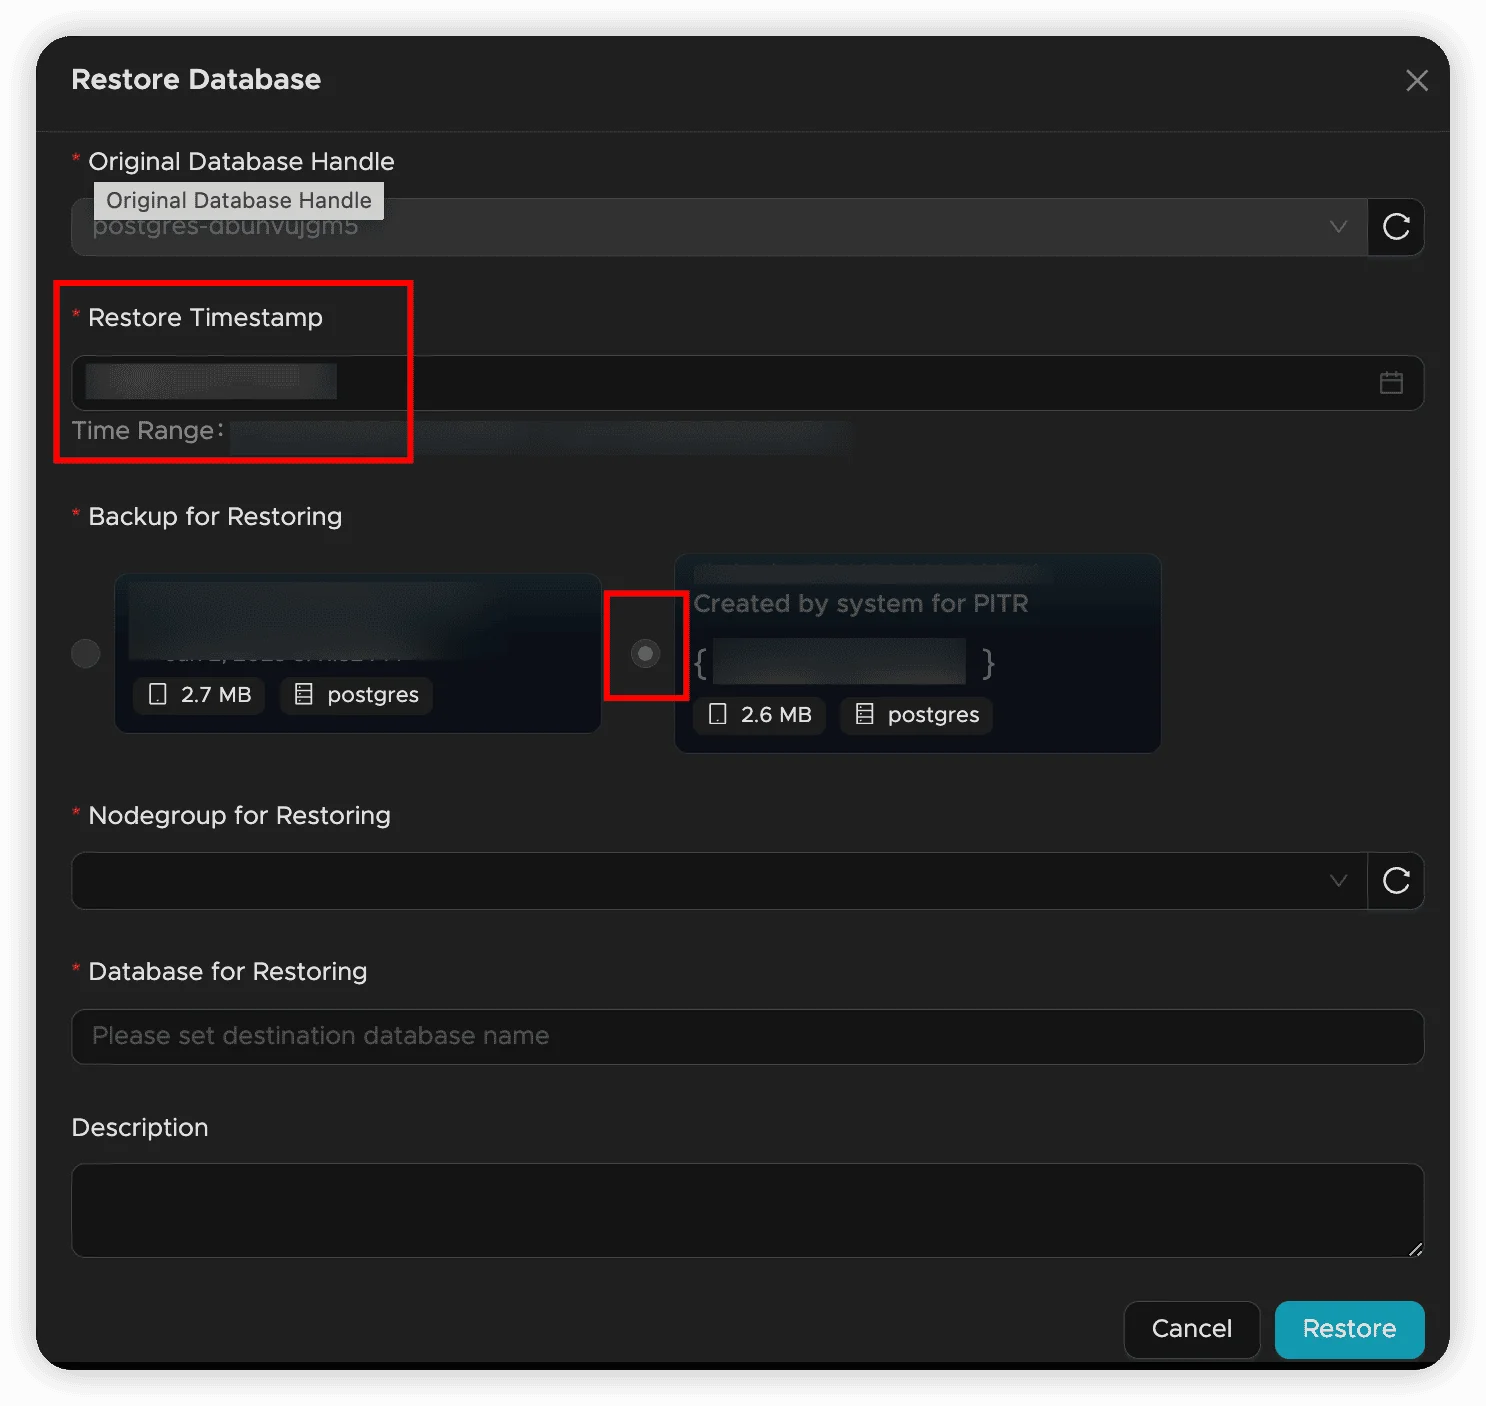
Configure Recovery Settings
- Recovery Time: Select the exact timestamp for restoration
- Use the date/time picker for precision
- Consider transaction boundaries and application logic
- Target Database Name: Specify the name for the restored database
- Target Nodegroup: Choose where to perform the recovery
- Description: Add notes about this recovery operation
- Recovery Time: Select the exact timestamp for restoration
-
Execute Recovery
- Review all settings carefully
- Click “OK” to start the recovery process
- Recovery runs asynchronously in the background
-
Monitor Recovery Progress
- Check task status on the “Backup” page
- Monitor resource utilization on the target nodegroup
- Recovery time depends on database size and selected time point

-
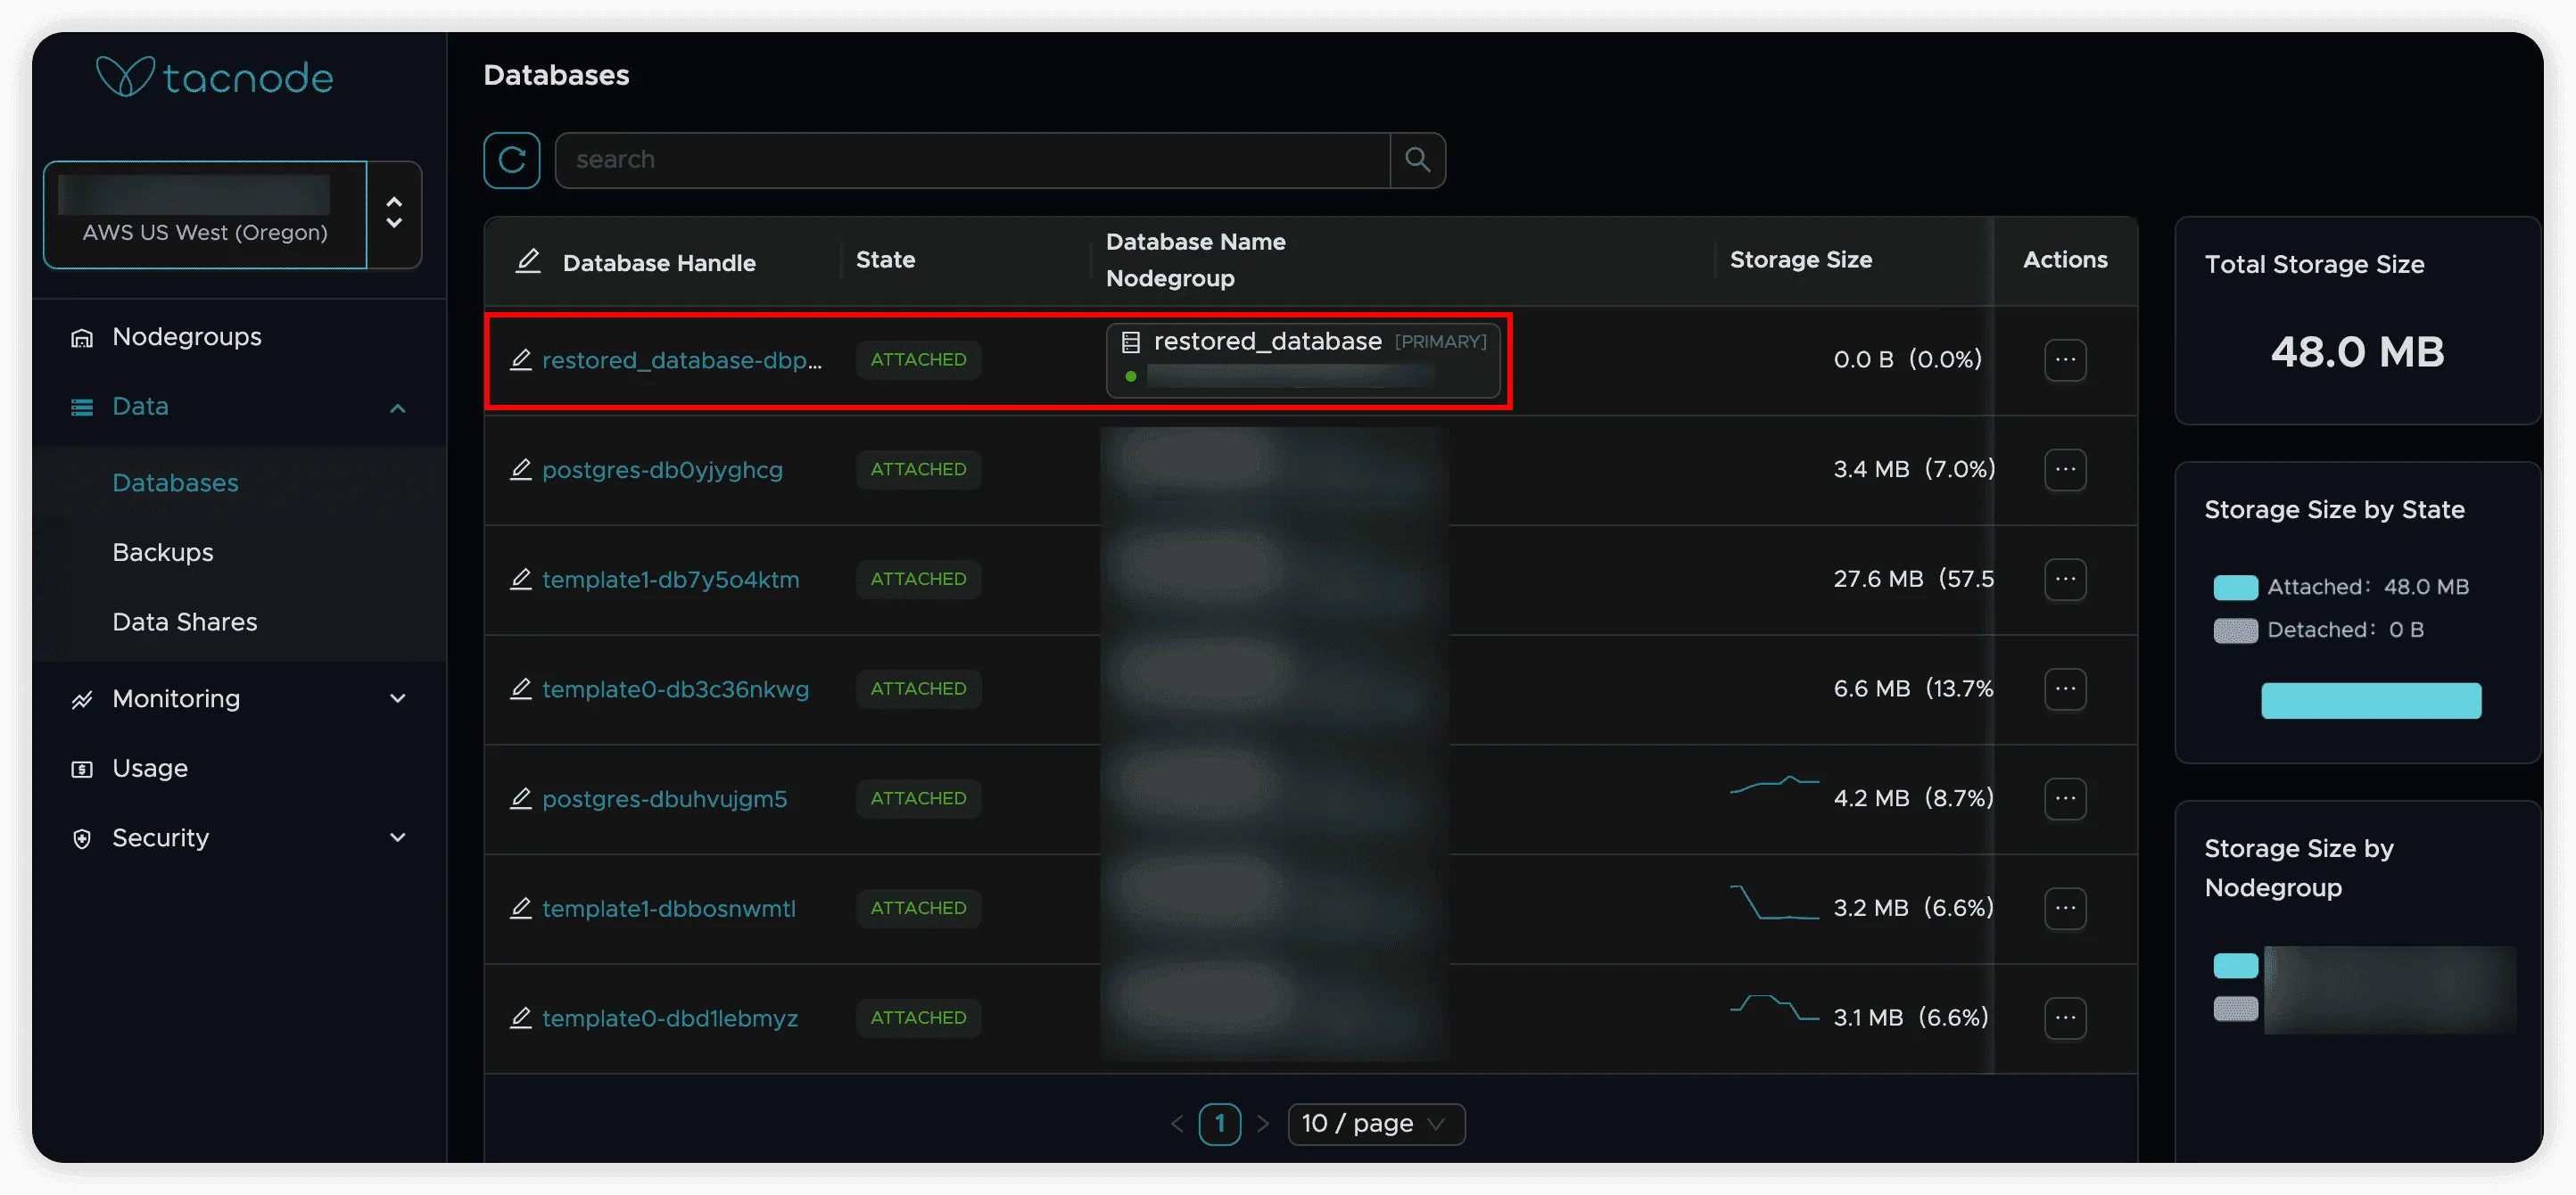
Verify Restored Database
- Once complete, locate the restored database in the “Database” tab
- Database is automatically attached to the target nodegroup
- Validate data integrity and completeness
Best Practices
Planning Recovery Operations
- Document Incidents: Record exact timestamps when issues occur
- Test Recovery: Regularly test PITR procedures in non-production environments
- Coordinate Teams: Notify stakeholders before performing recovery operations
- Validate Results: Always verify data integrity after recovery
Selecting Recovery Points
- Transaction Boundaries: Choose points between transactions when possible
- Application State: Consider application logic and data consistency
- Recent Changes: Be aware of any ongoing operations at the recovery time
- Business Logic: Ensure recovery point aligns with business requirements
Post-Recovery Tasks
- Data Validation: Verify that restored data meets expectations
- Application Testing: Test critical application functions
- User Communication: Inform users about the recovery operation
- Documentation: Record the incident and recovery details
Performance Considerations
Recovery Time Factors
- Database Size: Larger databases take longer to restore
- Recovery Point: Recent points generally recover faster
- Nodegroup Resources: Adequate CPU and memory improve performance
- Network Bandwidth: Affects data transfer during recovery
Resource Planning
- Nodegroup Sizing: Ensure target nodegroup can handle the workload
- Storage Space: Verify sufficient space for the restored database
- Concurrent Operations: Consider impact on other running workloads
- Network Capacity: Plan for data transfer requirements
Monitoring and Troubleshooting
Tracking Recovery Operations
- Monitor progress through the Backup page interface
- Watch nodegroup metrics during recovery
- Check system logs for any warnings or errors
- Set up alerts for long-running recovery operations
Common Issues and Solutions
- Recovery Timeout: Increase nodegroup resources or retry during low-traffic periods
- Insufficient Storage: Free up space or expand storage capacity
- Permission Errors: Verify user privileges and nodegroup access
- Timestamp Conflicts: Ensure selected time is within the retention window
Getting Support
For complex recovery scenarios or persistent issues:
- Collect recovery timestamps and database identifiers
- Document error messages and system status
- Contact Tacnode support with detailed incident information
- Provide business context and urgency level