Tacnode in 10 Minutes
Welcome to Tacnode! This quick-start guide will walk you through setting up your first database environment and running your first queries in just 10 minutes.
📋 What You'll Learn
By the end of this guide, you'll know how to:
- ✅ Create and configure your Tacnode environment
- ✅ Connect to your database using psql
- ✅ Create databases and tables
- ✅ Insert, query, and update data
🎯 Step 1: Prerequisites
Before we begin, you'll need to complete these quick setup steps:
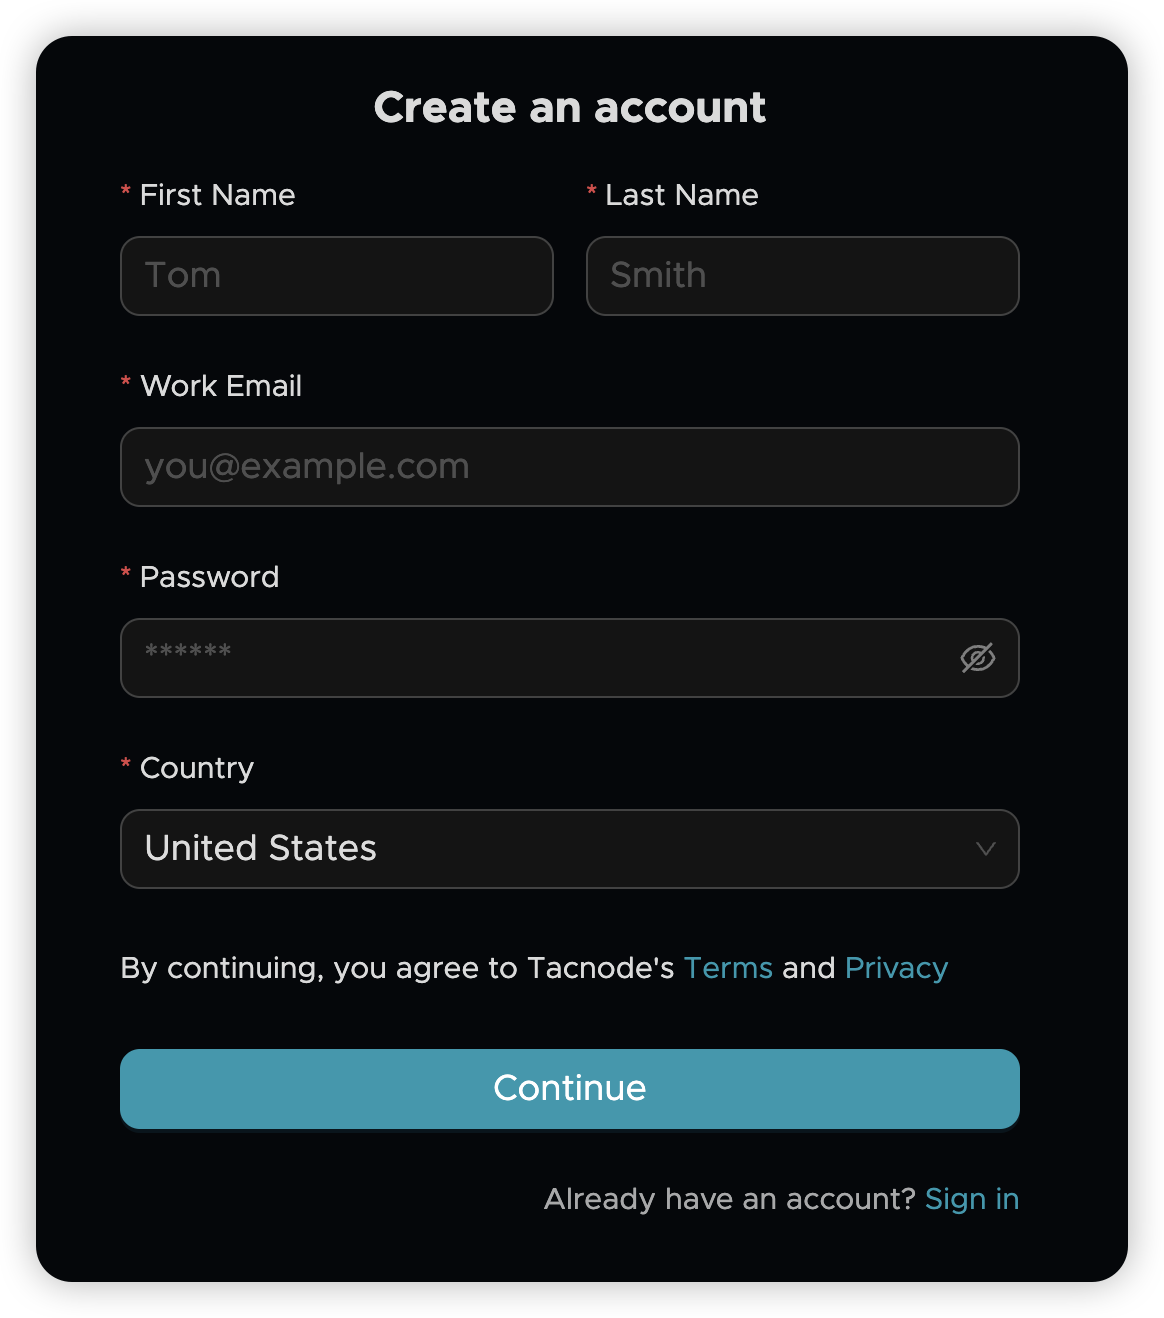
📝 Create Your Tacnode Account
- Visit the signup page: Go to Tacnode Signup
- Register with your email: New users can quickly register using any email address
💻 Install psql Client
You'll need the PostgreSQL command-line client to connect to Tacnode:
- Download psql: Visit the PostgreSQL official website
- Follow installation instructions for your operating system
💡 Tip: psql is the standard way to interact with PostgreSQL-compatible databases like Tacnode
⚙️ Step 2: Set Up Your Environment
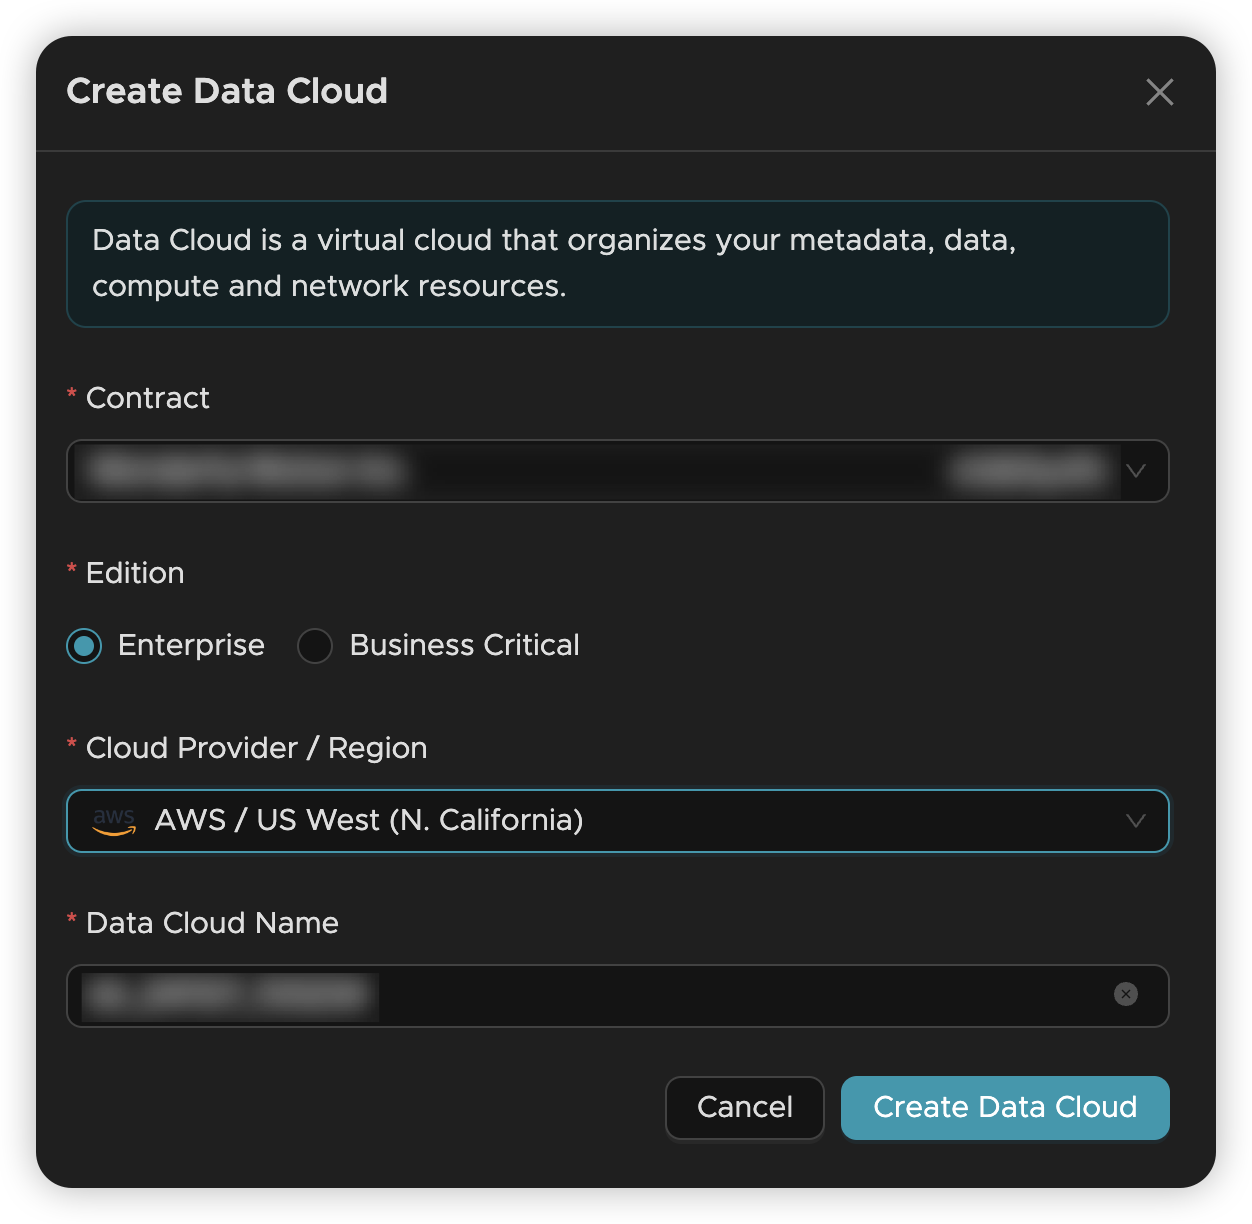
🏗️ Create Your Data Cloud
The Data Cloud is your dedicated workspace where all data operations happen.
- Log in to Tacnode
- Navigate to the Data Cloud management page
- Click "Create Data Cloud" to set up your workspace
📚 Learn more: Data Cloud Documentation
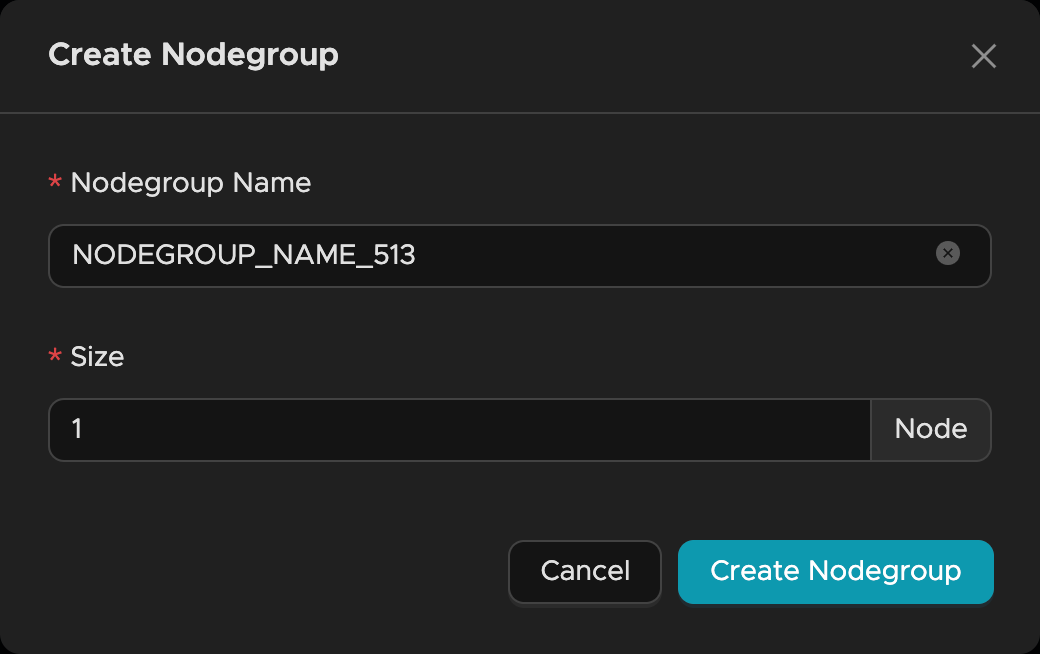
🖥️ Create Your Nodegroup
A Nodegroup is Tacnode's compute engine that processes all your database operations (DDL, DML, queries).
- Access Nodegroup management in one of two ways:
- From Data Cloud Center → Nodegroup
- Direct URL:
https://<cloud_regionid>-app.tacnode.io
- Click "+Nodegroup" to create your compute instance
📚 Learn more: Nodegroup Documentation
🌍 Regions: Check supported regions
🔌 Step 3: Connect to Your Database
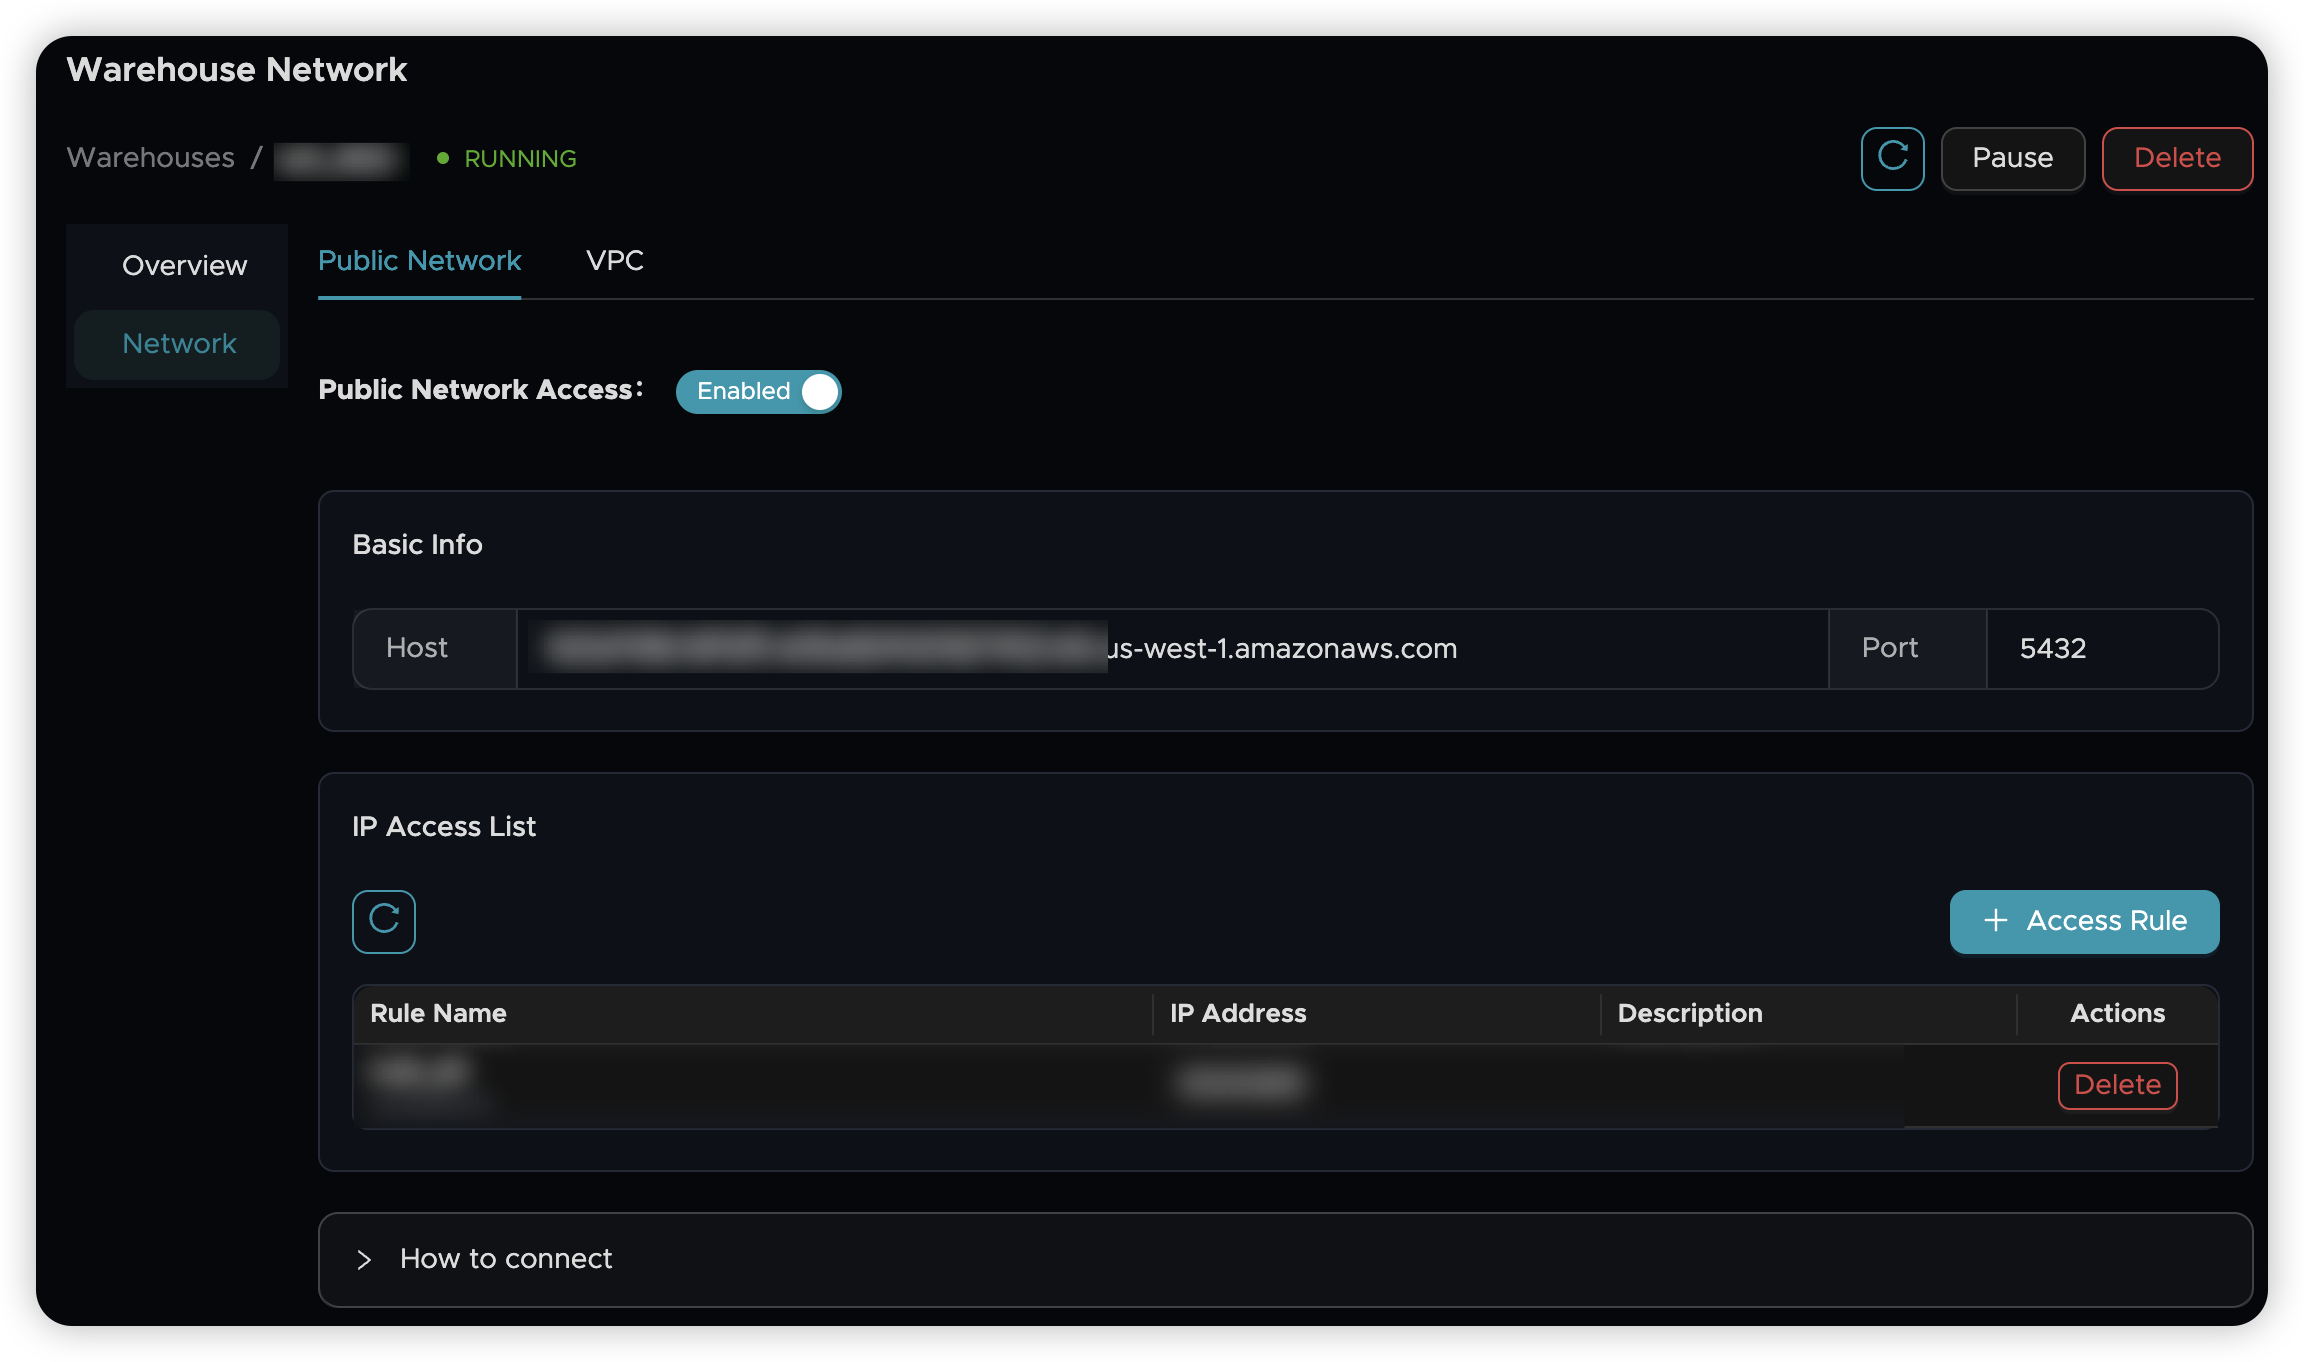
🌐 Enable Public Access
By default, Nodegroups use VPC networking. For this tutorial, we'll enable public access:
- Go to your Nodegroup details page
- Click the network settings
- Enable public network access
- Copy the connection details provided
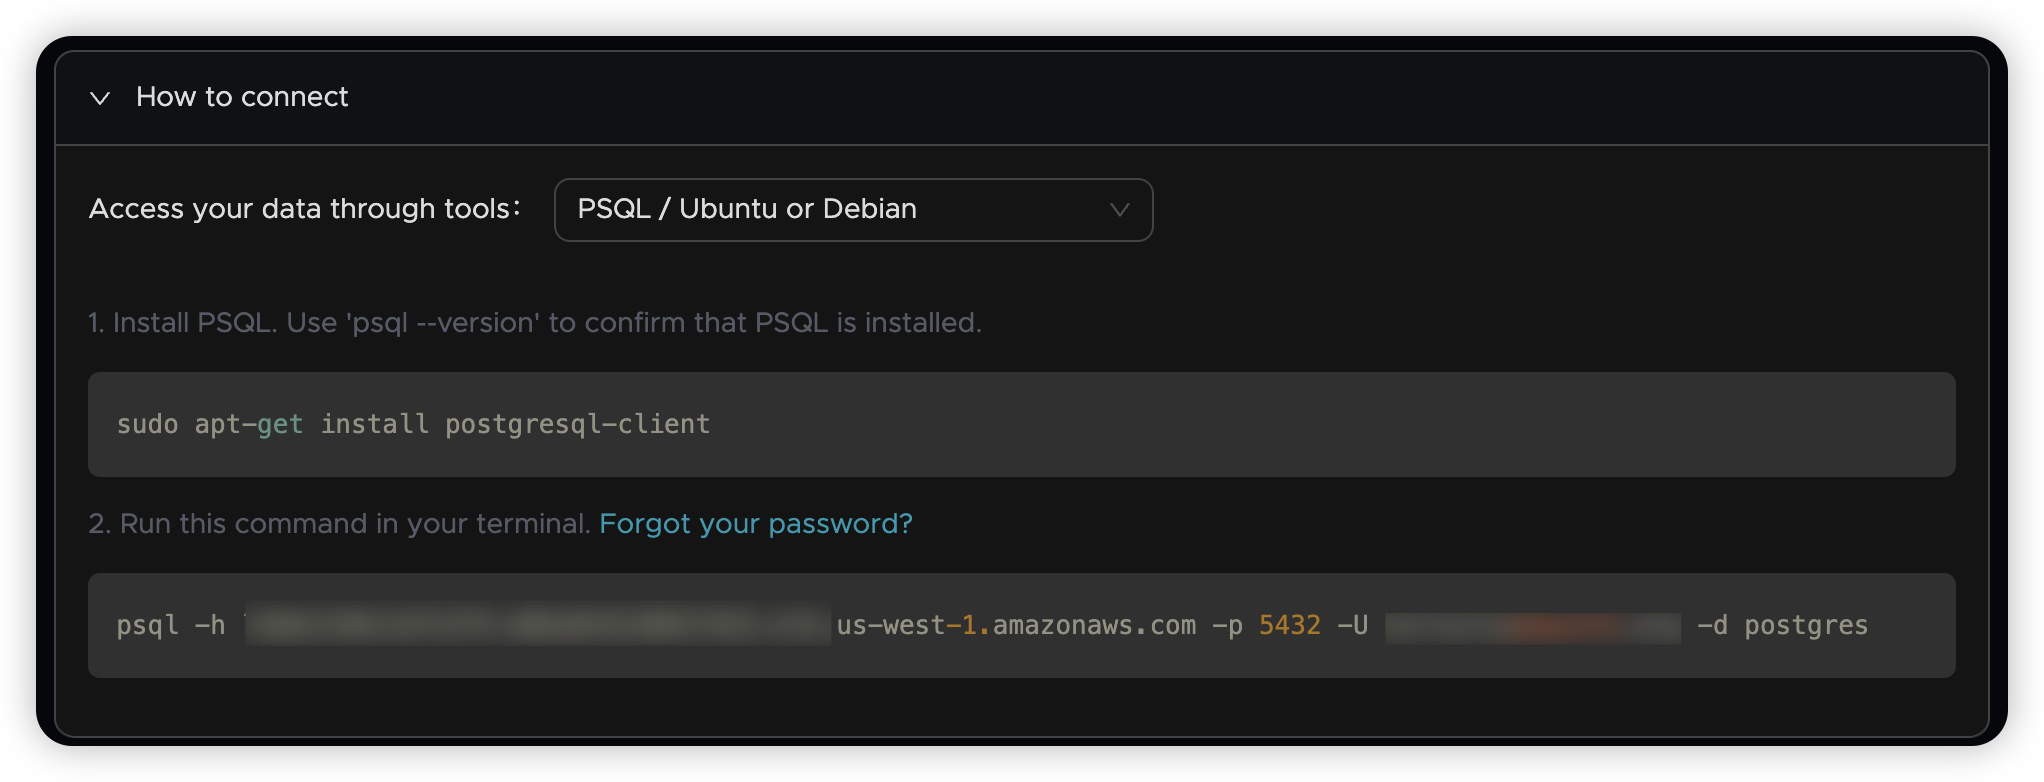
🔗 Connect Using psql
Use the following command template to connect:
Where:
<Account>: Your Tacnode account username<Host>: The public domain name from the connection details
🔐 Security Note: You'll be prompted for your password when connecting
🗄️ Step 4: Create Your First Database
Now that you're connected, let's create your first database and table!
📊 Create a Database
Create a new database called tac_test:
Switch to your new database:
✅ Success! You're now working in your new database
📋 Create a Table
Let's create a simple cars table to store vehicle information:
Verify your table was created:
🎉 Great! Your table is ready for data
📝 Step 5: Work with Your Data
Now let's add some data and run queries to see Tacnode in action!
➕ Insert Data
Add your first record to the cars table:
Result:
✅ Success! One row inserted
🔍 Query Your Data
Let's see what we've stored:
Result:
🎯 Perfect! Your data is there and ready to query
🔄 Update Data
Let's modify the existing record:
Result:
🎉 Excellent! Your data has been successfully updated
🎊 Congratulations!
You've successfully completed the Tacnode 10-minute quickstart! Here's what you accomplished:
✅ Set up your Tacnode environment
✅ Connected to your database
✅ Created a database and table
✅ Inserted, queried, and updated data
🚀 Next Steps
Ready to explore more? Here are your next steps:
- 📊 Advanced SQL Queries - Learn complex queries and optimizations
- 🔄 Data Import/Export - Work with larger datasets
- 🛡️ Security Features - Secure your data
💬 Need Help?
- 📖 Browse our full documentation
- 💬 Join our community forums
- 📧 Contact our support team
Happy querying with Tacnode! 🚀