
AWS VPC Configuration
Configure secure VPC endpoint connections between your AWS infrastructure and Tacnode Nodegroups using PrivateLink technology.
Learn how to establish secure private network connections between your AWS VPC and Tacnode Nodegroups using AWS PrivateLink endpoints.
Overview
AWS VPC endpoint connections provide secure, high-performance connectivity without exposing traffic to the public internet. This guide covers the complete setup process for AWS PrivateLink integration.
Prerequisites
- Active Tacnode Nodegroup in “Running” status
- AWS account with VPC administrative privileges
- Matching AWS region with your Nodegroup deployment
Configuration Process
Step 1: Configure Account Allowlist
Before creating the VPC endpoint, add your AWS account to the Nodegroup’s endpoint service allowlist.
Access Configuration:
Navigate to Nodegroup > Network > VPC and click + PrivateLink Endpoint
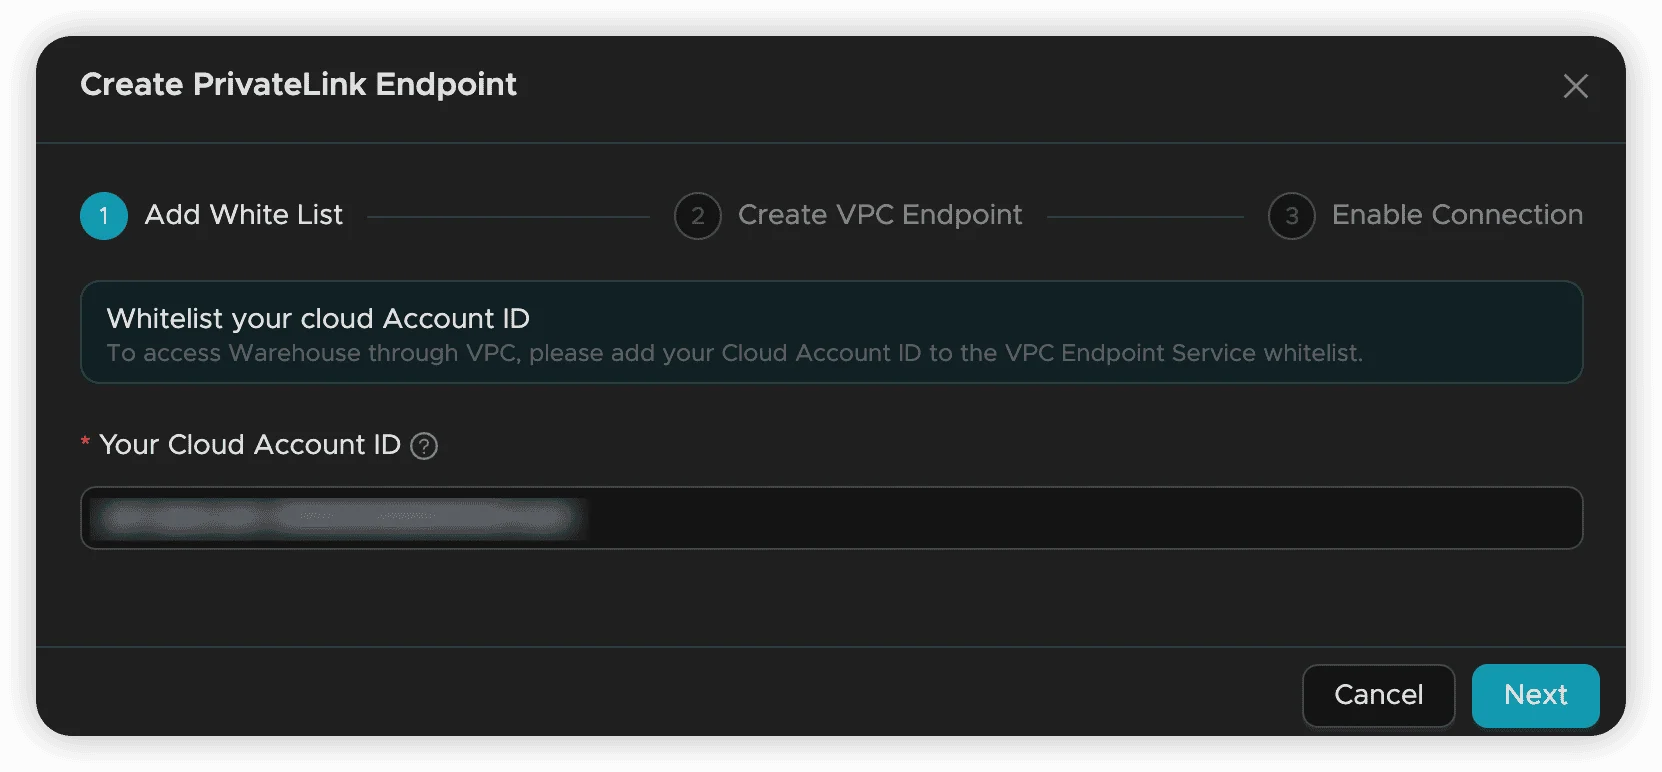
AWS Account Format: Use the complete AWS ARN format for your primary account:
arn:aws:iam::ACCOUNT_ID:rootFinding Your AWS ARN:
- Sign in to the AWS Management Console
- Click your account name (upper-right corner) → “Security Credentials”
- Locate your account ARN in the account details section

Critical Step: Without allowlist configuration, the endpoint service will not be discoverable in the AWS console, preventing endpoint creation.
Reference: AWS ARN Documentation
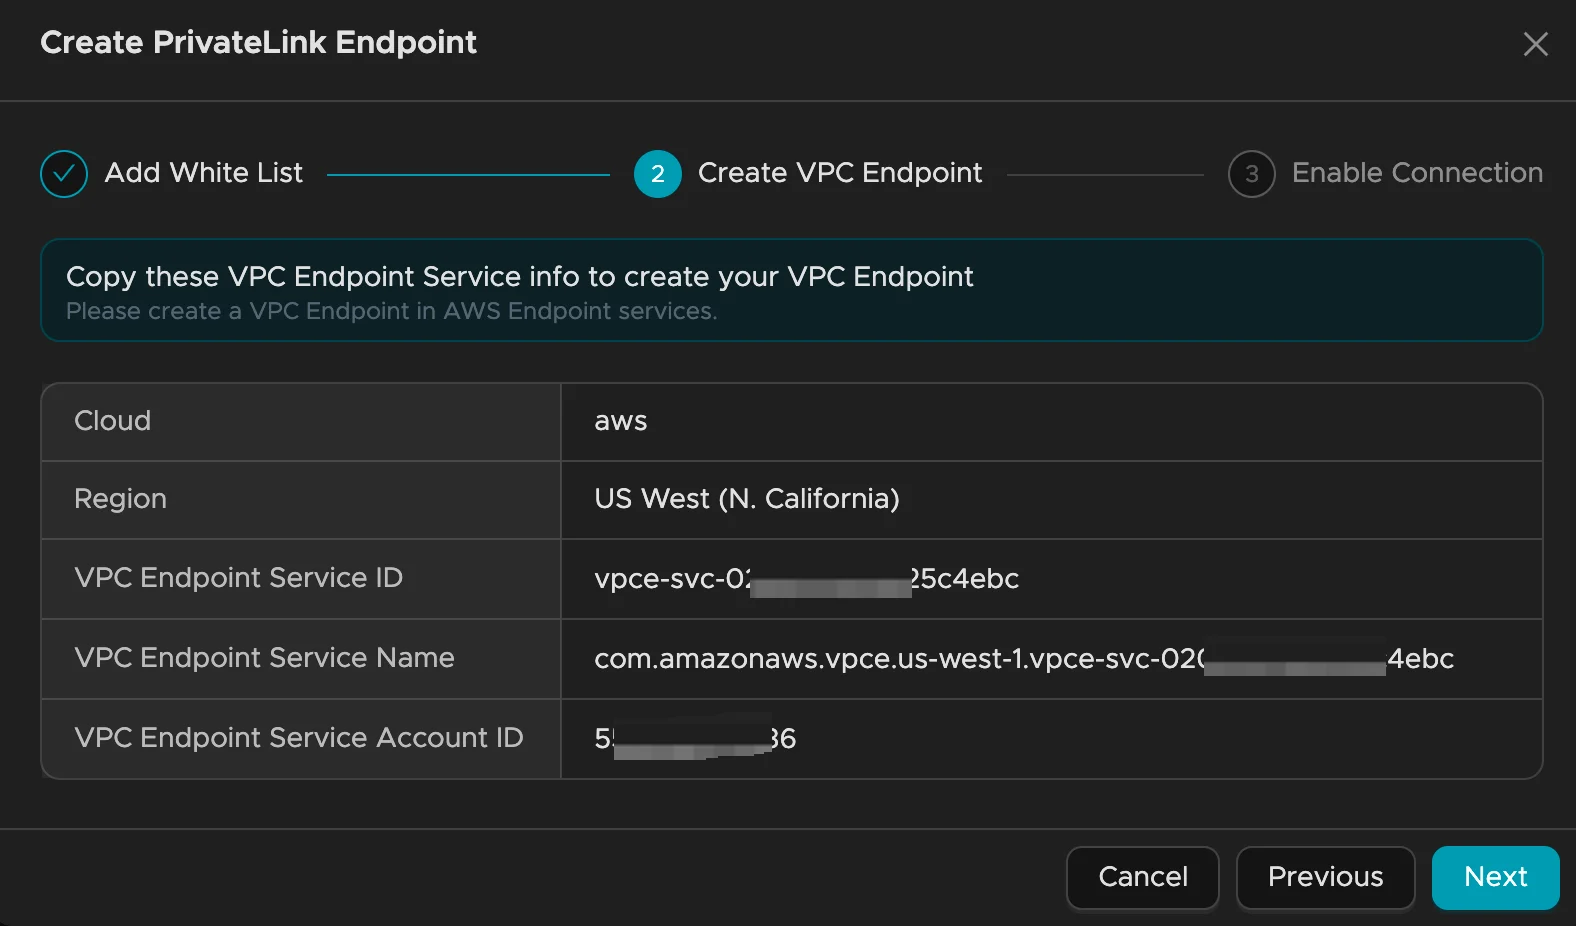
Step 2: Create VPC Endpoint
Access AWS Console: Navigate to VPC Console → Endpoints → Create Endpoint
Required Information (available from Nodegroup details page):
- Cloud Provider: AWS
- Region: Must match Nodegroup region
- Endpoint Service ID: Unique service identifier
- Endpoint Service Name: Service name for verification
- Service Account ID: Tacnode service account
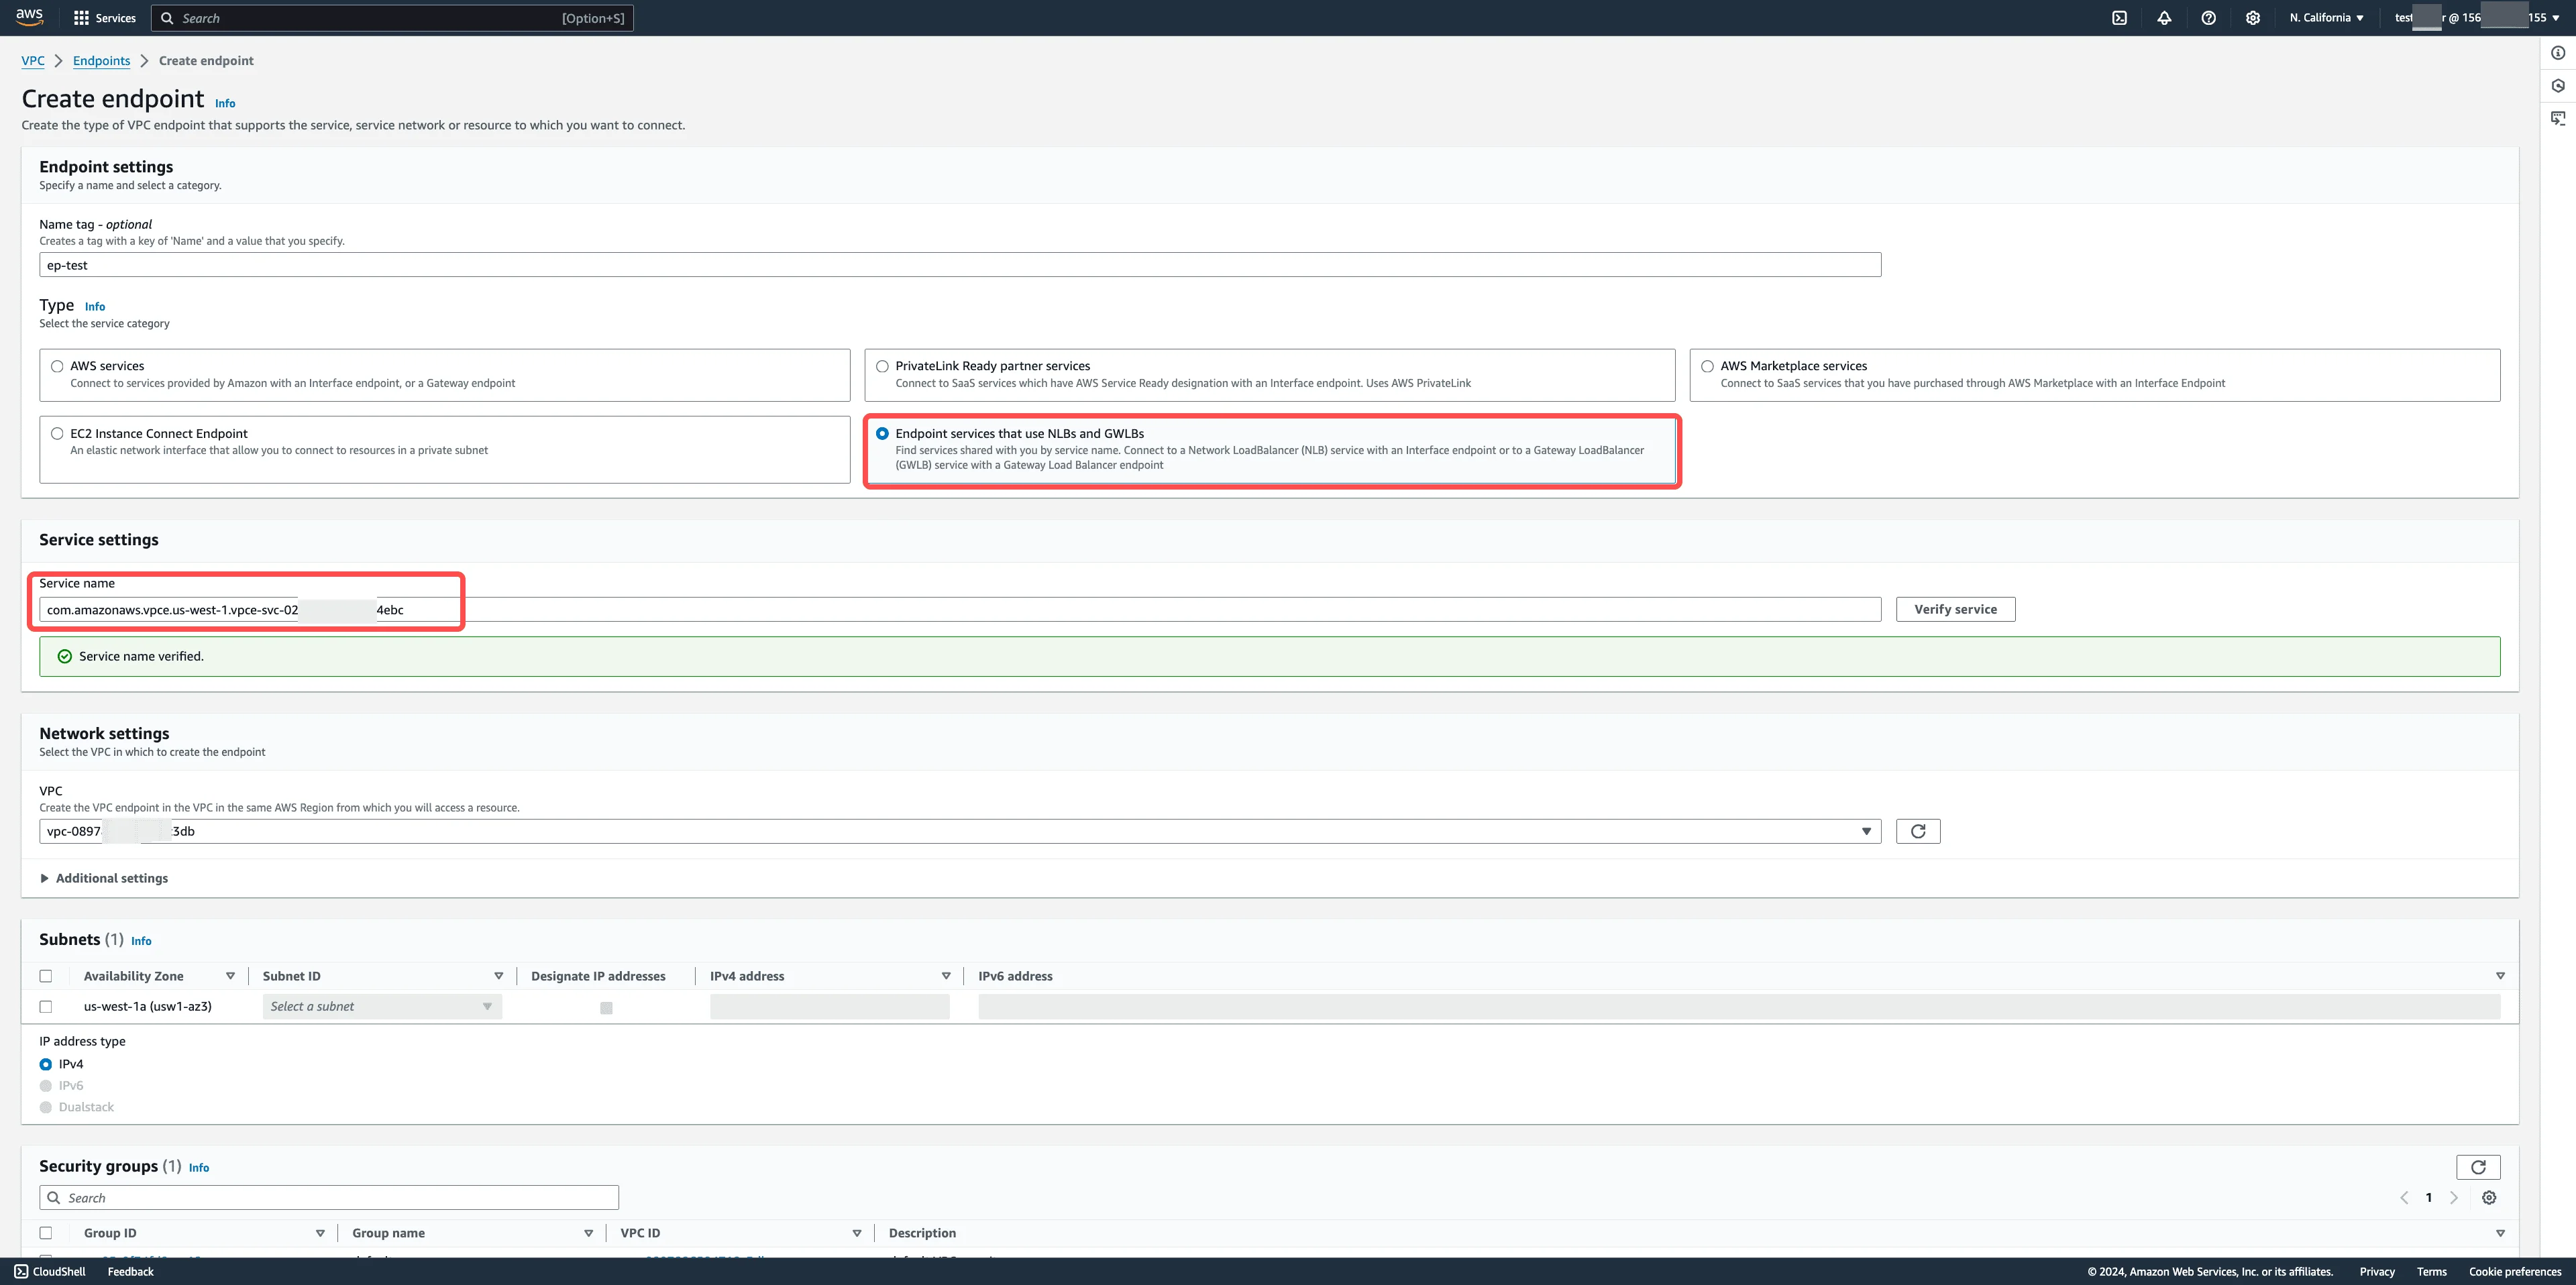
Endpoint Configuration Parameters
| Parameter | Description | Configuration Details |
|---|---|---|
| Endpoint Name | Custom identifier for your endpoint | Choose a descriptive name for easy identification |
| Service Type | Endpoint service category | Select appropriate service type from dropdown |
| Service Configuration | Endpoint service setup | Method 1: Click “Find service by name” and enter endpoint service name; Method 2: Click “Verify Service” to confirm service availability. Note: Service discovery requires successful allowlist configuration |
| VPC Selection | Target VPC for endpoint | Choose the VPC where you need Nodegroup access |
| Subnet Configuration | Availability Zone and subnet | 1. Select Availability Zone matching the endpoint service; 2. Choose appropriate subnet within that AZ |
| Security Group | Network access control | Select security group with appropriate inbound/outbound rules |
Service Discovery: Endpoint service information is available on the Nodegroup details page. If services don’t appear, verify allowlist configuration.
Additional Resources:
Step 3: Request Connection Approval
After endpoint creation, request approval from Tacnode:
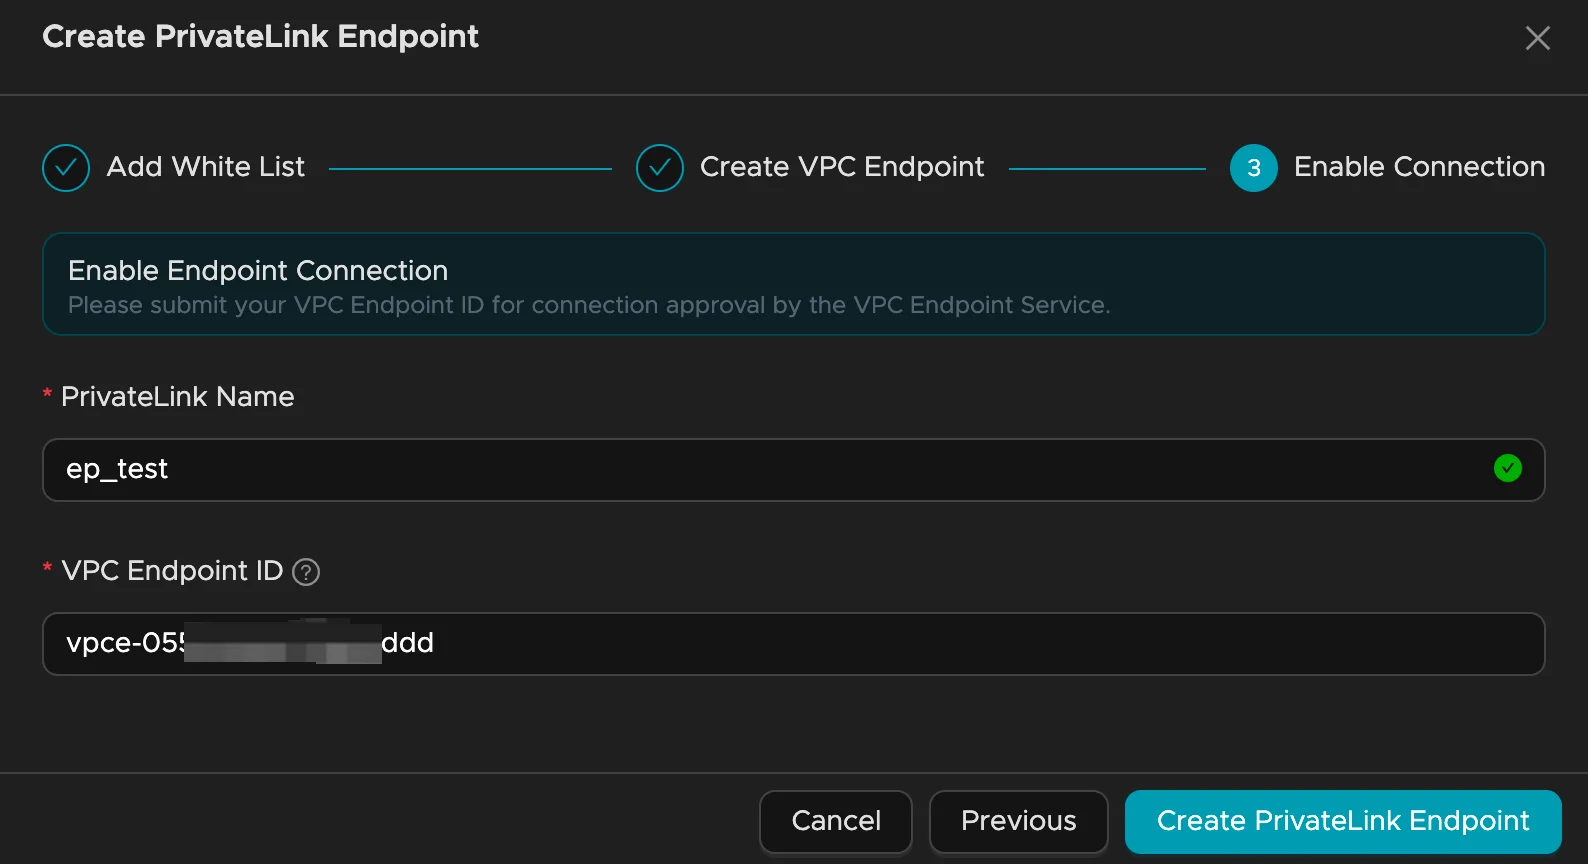
Required Information:
- Connection Name: Descriptive identifier for the connection
- Endpoint ID: AWS-generated endpoint identifier (found in AWS console)
Approval Process:
- Submit approval request with required information
- Tacnode reviews and approves the connection
- Connection status changes to “Available” (typically 1-2 minutes)
- Retrieve connection details for application configuration
Verification: Once approved, your endpoint appears in the Nodegroup network settings with connection details for database access.
Connection Ready: After approval, use the provided connection details to access your Nodegroup securely through the private network.